Connect with us

Growing and Harvesting Chia Seeds

10 Steps to Cultivate Your Homegrown Salvia Seeds

Published

on

10 Steps to Cultivate Your Homegrown Salvia Seeds

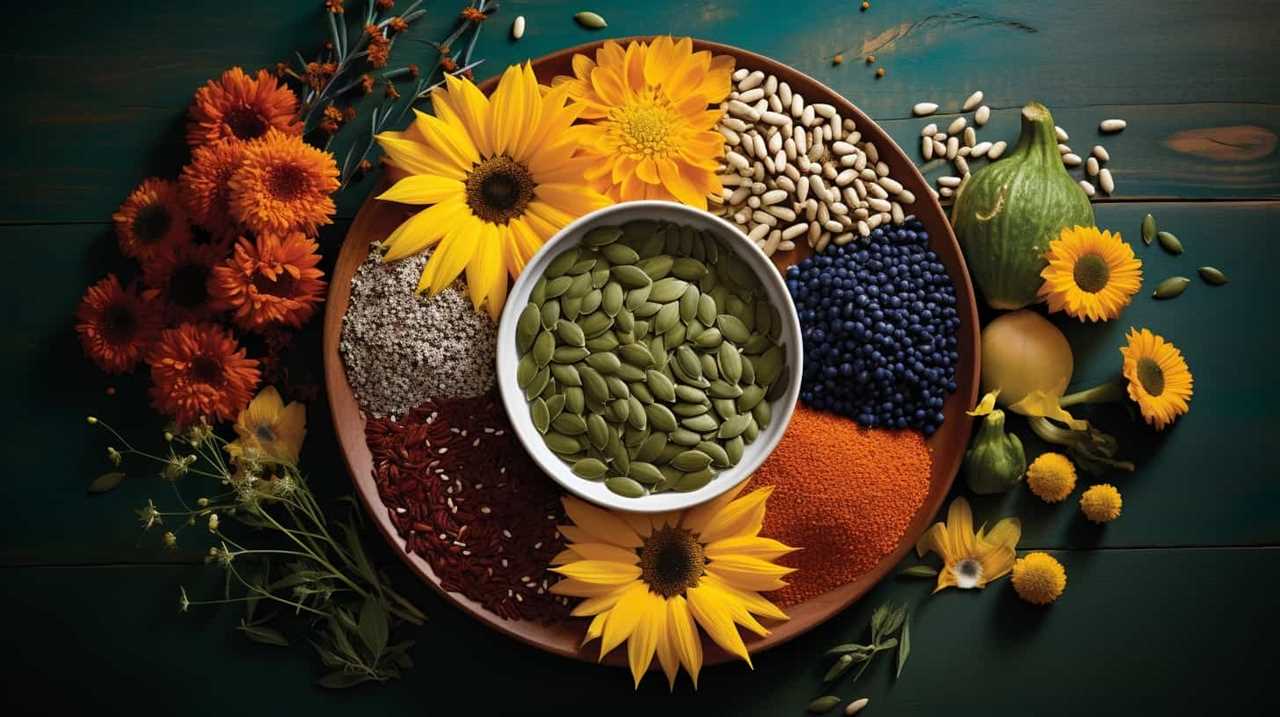
Our expert guide provides all the necessary information for cultivating your own salvia seeds in the comfort of your home. Follow our simple 10-step process to learn how to:

  1. Choose the right seeds
  2. Prepare the soil
  3. Sow the seeds
  4. Provide essential care
  5. Harvest and store your precious salvia seeds

With our precise and informative instructions, you’ll be able to troubleshoot any issues that may arise along the way.

Let’s get started on this rewarding journey of serving yourself with nature’s bountiful offerings.

Key Takeaways

  • Select fresh, high-quality seeds from a reputable source.
  • Test soil pH and nutrient levels before planting.
  • Provide adequate moisture and light for germination and growth.
  • Water consistently to keep soil moist but not waterlogged.
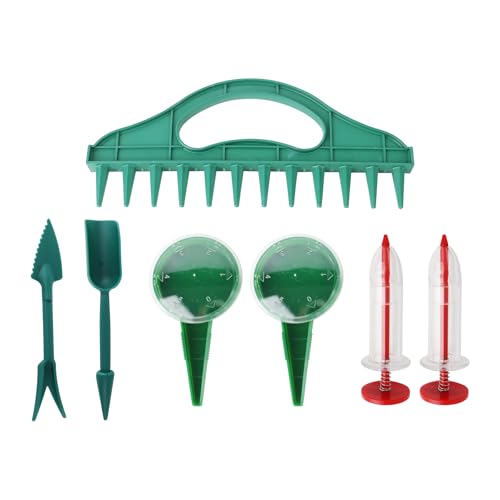
Choosing the Right Salvia Seeds

To ensure successful cultivation, we need to carefully select the right salvia seeds.

chia seeds health benefits

Starting seeds is a crucial step in the process of growing your own salvia plants. It’s essential to choose high-quality seeds to ensure the best possible outcome.

When selecting salvia seeds, it’s important to consider their quality. Look for seeds that are fresh, plump, and free from any signs of damage or disease. High-quality seeds will have a higher germination rate and will be more likely to produce healthy, vigorous plants.

Additionally, selecting seeds from a reputable source or supplier can further increase the chances of success.

Advertisement

Preparing the Soil for Planting

We begin by loosening the soil and removing any debris. This step is crucial to create a favorable environment for seedling growth.

chia seeds asda

Here are three important considerations for preparing the soil for planting:

  1. Testing the soil: Before planting your salvia seeds, it’s vital to test the soil pH and nutrient levels. This will help you determine if any amendments are needed to optimize the soil for seedling care.

  2. Adding organic matter: Incorporating compost or well-rotted manure into the soil can improve its structure and fertility. This will provide essential nutrients and promote healthy root development for your salvia seedlings.

  3. Ensuring proper drainage: Salvia plants prefer well-draining soil. To achieve this, you can amend the soil with sand or perlite to improve drainage, especially if your soil tends to be heavy or clay-like.

    how to consume chia seeds

Sowing the Salvia Seeds

Now that we’ve prepared the soil, it’s time to sow the Salvia seeds. To ensure optimal conditions for planting, we need to consider factors such as sunlight, moisture, and temperature.

It’s important to be patient during the germination process, as it can take anywhere from one to three weeks for the seeds to sprout. Additionally, we should be aware of common seedling issues, such as damping off or overcrowding, and take necessary precautions to prevent them.

Optimal Planting Conditions

Creating ideal planting conditions is essential for successfully sowing your homegrown Salvia seeds. Here are three crucial factors to consider:

  1. Optimal Temperature: Salvia seeds thrive in warm temperatures between 70°F and 80°F (21°C to 27°C). Avoid planting them when the temperature drops below 60°F (15°C) as this may hinder germination.

    what is chia seeds in telugu

  2. Soil pH: Salvia prefers slightly acidic to neutral soil with a pH range of 6.0 to 7.5. Testing the soil before planting can help you determine its pH level. If the pH is too low or high, consider amending the soil with organic matter or lime to adjust it accordingly.

  3. Well-Drained Soil: Salvia plants dislike wet feet, so it’s crucial to ensure the soil has good drainage. Incorporate organic matter like compost or peat moss into the soil to improve its drainage capabilities.

Germination Time Frame

To maximize the chances of successful germination, it’s important to carefully time the sowing of your Salvia seeds. Salvia seeds require specific conditions to germinate, so it’s crucial to follow the recommended guidelines.

Advertisement

Generally, the best time to sow Salvia seeds is in early spring, when the soil temperature is around 70 degrees Fahrenheit. Start by preparing a well-draining seedling tray filled with a sterile seed-starting mix. Sow the seeds on the surface of the soil, lightly pressing them down.

Cover the tray with a clear plastic dome or plastic wrap to create a mini greenhouse effect. Place the tray in a warm and well-lit area, ensuring the soil remains consistently moist but not waterlogged. Be patient, as Salvia seeds can take anywhere from 7 to 21 days to germinate.

Once the seedlings emerge, provide them with adequate light, water, and ventilation to ensure healthy growth.

Common Seedling Issues?

After carefully sowing your Salvia seeds according to the recommended guidelines, it’s important to be aware of common seedling issues that may arise during the germination process. Identifying seedling diseases and preventing nutrient deficiencies are crucial in ensuring the healthy growth of your Salvia seedlings.

Here are three common seedling issues to watch out for:

Advertisement

chia seeds health benefits for skin and hair

  1. Damping-off disease: This fungal infection can cause seedlings to wilt and collapse. To prevent damping-off, ensure good air circulation, use sterile soil, and avoid overwatering.

  2. Fusarium wilt: This disease affects the vascular system of the seedlings, causing stunted growth and yellowing leaves. To prevent fusarium wilt, practice crop rotation, use disease-free seeds, and maintain proper soil drainage.

  3. Nutrient deficiencies: Insufficient nutrients can result in yellowing or discolored leaves. Provide balanced fertilization and monitor soil pH levels to prevent nutrient deficiencies.

Providing Adequate Water and Sunlight

When cultivating our homegrown Salvia seeds, it’s crucial to provide them with the right amount of water and sunlight.

chia seeds nutrition facts

We need to consider the frequency and amount of watering, ensuring that the soil is consistently moist but not waterlogged.

Additionally, exposing the plants to adequate sunlight for the recommended duration is essential for their growth and overall health.

Proper care in providing these elements will greatly contribute to the successful cultivation of our Salvia seeds.

Watering Frequency and Amount

We ensure that our Salvia seeds receive adequate water and sunlight by regularly watering them with the appropriate amount of water. Proper watering techniques are crucial to prevent overwatering and promote healthy growth. Here are three key points to consider:

Advertisement

chia seeds benefits dr oz

  1. Watering frequency: Salvia seeds should be watered consistently to keep the soil moist but not waterlogged. Watering once or twice a week is usually sufficient, but it may vary depending on the climate and soil conditions.

  2. Watering amount: When watering, make sure to provide enough water to thoroughly soak the soil. Aim to moisten the top few inches of soil, but avoid excessive watering that can lead to root rot.

  3. Sunlight exposure: Salvia plants thrive in full sun, so it’s important to place them in an area where they can receive at least six to eight hours of direct sunlight daily. This will ensure optimal growth and bloom.

Sunlight Exposure Duration

To ensure optimal growth and bloom, it’s important for Salvia seeds to receive an adequate duration of sunlight exposure. Sun exposure benefits the growth of Salvia plants in multiple ways.

chia seeds shake

Firstly, sunlight provides the energy needed for photosynthesis, the process by which plants convert sunlight into food. This food is essential for the plant’s growth and development.

Secondly, sunlight intensity affects the production of pigments in the plant, which in turn influences the color and vibrancy of the flowers.

Therefore, ensuring that your Salvia seeds receive the right amount of sunlight is crucial for their overall health and appearance. However, it’s important to strike a balance and avoid excessive exposure, which can lead to sunburn or wilting.

In the next section, we’ll discuss the importance of proper care in maintaining the health of your Salvia plants.

Advertisement

chia seeds in water benefits for skin

Importance of Proper Care

Proper care for your Salvia plants, including providing adequate water and sunlight, is essential for their overall health and thriving growth. Here are three reasons why regular maintenance is important:

  1. Watering: Salvia plants require consistent watering to prevent dehydration and ensure proper nutrient absorption. Water them deeply, but avoid overwatering, as this can lead to root rot and other issues. Regularly check the moisture level of the soil and adjust watering accordingly.

  2. Sunlight: Salvia plants thrive in full sun or partial shade. They need at least six hours of direct sunlight each day to promote healthy growth and vibrant blooms. Ensure they’re placed in a location where they can receive adequate sunlight.

  3. Potential risks and challenges: Neglecting proper care can lead to various problems such as stunted growth, wilting, and susceptibility to pests and diseases. Regular maintenance helps prevent these issues and keeps your Salvia plants healthy and beautiful.

    how to drink chia seeds

Fertilizing the Salvia Plants

Applying fertilizer is crucial for the healthy growth of our salvia plants. Proper fertilization provides essential nutrients that promote strong roots, vibrant foliage, and abundant blooms. When it comes to fertilizing salvia, it’s important to choose the right fertilizer types and follow a fertilizing schedule to ensure optimal results.

Here is a table to help you understand the different fertilizer types and their benefits:

Fertilizer Type Benefits
Organic Provides slow-release nutrients, improves soil structure
Synthetic Offers precise nutrient ratios, readily available to plants
Liquid Quick absorption, ideal for foliar feeding and seedlings
Slow-release Provides nutrients over an extended period, reduces the risk of over-fertilization

To ensure proper fertilization, follow a fertilizing schedule based on the specific needs of your salvia plants. Generally, it is recommended to fertilize salvia every 4-6 weeks during the growing season, starting in early spring and ending in late summer.

Monitoring and Controlling Pests

After properly fertilizing our salvia plants, it’s important to monitor and control pests to ensure their well-being. Here are three effective ways to manage pests in a natural and organic manner:

what to put chia seeds in

  1. Companion planting: Introduce pest-repelling plants, such as marigolds or lavender, near your salvia plants. These companion plants emit scents that deter pests, creating a protective barrier.

  2. Homemade insecticides: Create your own natural pest control solutions using ingredients like neem oil, garlic, or chili peppers. These organic concoctions can effectively repel pests without harming your salvia plants or the environment.

  3. Regular inspections: Regularly inspect your salvia plants for any signs of pest infestation. Look for chewed leaves, discolored spots, or webs. If you spot any pests, promptly remove them by hand or use a gentle spray of water to wash them away.

Pruning and Training the Salvia Plants

To maintain optimal growth and shape our salvia plants, we prune and train them regularly. Pruning techniques involve removing dead or damaged branches, as well as any excessive growth that may hinder proper airflow and light penetration. This helps prevent diseases and promotes overall plant health.

Advertisement

chia seeds aldi uk

We also use training methods to guide the direction of growth and encourage a more compact and bushy form. This can be done by gently bending and securing branches, using stakes or ties. By training the plants, we can ensure a more aesthetically pleasing appearance and enhance their ability to produce more flowers.

It’s important to regularly inspect and prune the plants throughout the growing season to maintain their health and vigor.

Harvesting the Salvia Seeds

To continue our gardening journey, let’s delve into the process of harvesting the salvia seeds, a crucial step in cultivating our homegrown plants.

Harvesting the seeds at the right time is essential to ensure their viability and preserve their freshness. Here are some harvesting techniques to help you gather the seeds successfully:

chia seeds nutrition facts per tbsp

  1. Wait for the seed pods to dry and turn brown before harvesting. This indicates that the seeds are mature and ready for collection.

  2. Gently remove the seed pods from the plant by cutting the stems or using your fingers. Be careful not to damage the seeds.

  3. Place the seed pods in a paper bag or envelope to allow them to continue drying for a few more weeks. This will help preserve their freshness and prevent mold or rot.

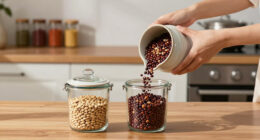
Drying and Storing the Salvia Seeds

Now let’s move on to drying and storing the salvia seeds to ensure their long-term viability and successful cultivation. Properly drying and storing your seeds is crucial for preserving their quality and maximizing their chances of germination. Here are some effective techniques for storing salvia seeds:

Advertisement

benefits of chia seeds for skin

Technique Description Tips
Airtight Container Place the seeds in an airtight container, such as a glass jar or a resealable plastic bag, to protect them from moisture and pests. Label the container with the seed variety and date of collection.
Cool and Dark Location Store the container in a cool and dark place, like a basement or refrigerator, to maintain a stable temperature and prevent exposure to light. Avoid storing seeds near sources of heat or fluctuating temperatures.
Desiccant Packs Include desiccant packs in the container to absorb any excess moisture and prevent mold growth. Replace the desiccant packs regularly to ensure effectiveness.

By following these storing techniques, you can maintain the seed viability and increase your chances of successful cultivation. Now, let’s move on to troubleshooting common salvia seed cultivation issues.

Troubleshooting Common Salvia Seed Cultivation Issues

Let’s address common issues you may encounter while cultivating your homegrown salvia seeds. Here are three troubleshooting tips to help you overcome germination problems and prevent fungal diseases:

  1. Inadequate moisture: Salvia seeds require consistent moisture to germinate. If your seeds aren’t sprouting, ensure that you’re maintaining a moist but not waterlogged environment. Regularly check the soil moisture and adjust watering accordingly.

  2. Poor seed quality: Sometimes, germination problems can arise due to low-quality seeds. To increase the chances of successful germination, always choose high-quality seeds from reputable sources. Conduct a germination test before planting to determine the viability of your seeds.

    chia seeds hydration

  3. Fungal diseases: To prevent fungal diseases that can affect seed germination, practice good sanitation. Ensure proper air circulation and avoid overcrowding by thinning out seedlings. Additionally, use a well-draining soil mix and avoid overwatering, as excessive moisture can lead to fungal growth.

Frequently Asked Questions

How Long Does It Take for Salvia Seeds to Germinate?

It usually takes around 1-3 weeks for salvia seeds to germinate. Providing ideal growing conditions such as well-drained soil, consistent moisture, and warm temperatures will help speed up the germination process.

Can Salvia Plants Be Grown Indoors?

Yes, salvia plants can be successfully grown indoors. We have found that providing the ideal growing conditions, such as proper lighting, temperature, and humidity levels, can lead to healthy and thriving salvia plants.

What Is the Best Time of Year to Sow Salvia Seeds?

The best time of year to sow salvia seeds is in the spring, when the soil is warm and frost is no longer a threat. Our experience has shown that following these tips and tricks gives the best results.

Advertisement

chia seeds weight loss

How Often Should Salvia Plants Be Watered?

We find that salvia plants thrive when watered regularly. Proper care techniques include monitoring soil moisture and watering when the top inch feels dry. Overwatering can lead to root rot, so it’s important not to water too frequently.

Can Salvia Plants Tolerate Frost or Cold Temperatures?

Salvia plants can tolerate frost and cold temperatures to some extent. However, excessive cold can damage or kill them. It’s important to provide protection during colder months to ensure their survival.

Conclusion

In conclusion, cultivating your own homegrown salvia seeds is like nurturing a secret garden of beauty and serenity. With proper care and attention, you can watch these tiny seeds blossom into majestic plants that bring joy to your surroundings.

From choosing the right seeds to harvesting and storing them, each step is a rewarding journey filled with growth and fulfillment.

chia seeds benefits weight loss

So, embark on this botanical adventure and let your green thumb create a sanctuary of nature’s wonders.

Advertisement
Continue Reading
Advertisement

Growing and Harvesting Chia Seeds

Your Guide to Successfully Harvesting Chia Seeds

Published

on

By

Did you know that chia seeds are packed with essential nutrients and can be easily grown and harvested in your own backyard?

In this guide, we’ll show you how to successfully harvest chia seeds, step by step. Our evidence-based tips and practical advice will help you identify the perfect time to harvest, prepare the plants, and handpick the ripe seeds.

Plus, we’ll share expert tips on drying and storing your chia seeds for long-lasting freshness.

Let’s get started on your chia seed harvesting journey!

Advertisement

chia seeds benefits weight loss

Key Takeaways

  • Chia seeds require warm temperatures between 70-80°F (21-27°C) for proper development.
  • Monitoring soil moisture levels is vital for chia seed maturity.
  • Gently touch the seeds to evaluate seed moisture, they should feel dry to the touch.
  • Harvest chia seeds when the plant is fully matured with dried flower heads and brown seeds.

Choosing the Right Time to Harvest

We carefully consider the optimal timing for chia seed harvest to ensure maximum yield and quality. Maximizing chia seed yield is crucial for those who desire to serve others with the best possible products.

Several factors affect chia seed maturity, and understanding these can help determine the right time for harvest. Firstly, temperature plays a significant role. Chia seeds require warm temperatures for proper development, typically between 70-80°F (21-27°C).

Additionally, the length of daylight hours affects the seed maturity process. Chia plants need a certain number of hours of daylight to reach full maturity.

Lastly, monitoring the moisture levels in the soil is vital. Chia plants thrive in well-drained soils, and excessive moisture can delay seed maturity.

chia seeds nutrition facts per tbsp

By carefully considering these factors, we can ensure that we harvest chia seeds at the right time to maximize yield and quality.

Now, let’s move on to identifying signs of ripeness.

Advertisement

Identifying Signs of Ripeness

To determine the optimal time for harvesting chia seeds, let’s now delve into the process of identifying signs of ripeness. Here are some key indicators to help you evaluate the ripeness of your chia seeds:

  • Evaluating seed moisture: Gently touch the seeds and check for dryness. They should feel dry to the touch and not sticky or moist.

    chia seeds side effects heart

  • Testing seed coloration: Look for a uniform color throughout the seeds. They should appear dark brown or black, indicating full maturity.

  • Observing seed size: Mature chia seeds tend to be larger in size compared to immature ones. Look for plump and well-developed seeds.

  • Monitoring seed shedding: As the chia plant reaches maturity, the seeds will start to fall off the plant naturally. Keep an eye out for seed shedding as a sign that they’re ready for harvest.

By keeping these signs in mind, you’ll be able to confidently determine the ripeness of your chia seeds and harvest them at their peak freshness.

how to eat chia seeds

Happy harvesting!

Preparing the Plants for Harvesting

Once the signs of ripeness have been identified, it’s important to take the necessary steps to prepare the chia plants for harvesting. To ensure a successful harvest, proper soil preparation is essential.

Start by clearing any weeds or debris from the planting area and loosening the soil using a garden fork or tiller. Chia plants thrive in well-drained soil, so consider adding organic matter such as compost or aged manure to improve soil structure and fertility.

Advertisement

Additionally, pest control is crucial in maintaining healthy chia plants. Check for any signs of insect infestation or disease and take appropriate measures to address them. This may involve using natural pest control methods or organic insecticides. Regularly monitor the plants for any signs of damage and promptly address any issues that arise.

chia seeds nutrition facts tablespoon

Harvesting Chia Seeds by Hand

Efficiency is key when it comes to harvesting chia seeds by hand. To maximize your chia seed yield during hand harvesting, consider the following tips:

  • Begin harvesting when the chia plant is fully matured, indicated by the dried flower heads and brown seeds.
  • Use a pair of sharp scissors or shears to cut the seed heads off the plant, making sure to leave a few inches of stem attached.
  • Place a collection container, such as a bucket or bag, underneath the plant to catch the falling seeds.
  • After harvesting, gently rub the seed heads between your hands to remove any remaining seeds.

While hand harvesting chia seeds may require more time and effort compared to mechanical harvesting, it offers several advantages. It allows for selective harvesting, where only ripe seed heads are collected, ensuring better seed quality. Additionally, hand harvesting allows for a more intimate connection with the plants and a deeper appreciation for the process.

Drying and Storing Chia Seeds

After hand harvesting chia seeds, the next step is to properly dry and store them. To ensure optimal drying, spread the seeds in a single layer on a clean, dry surface. Avoid direct sunlight and high humidity, as they can affect the quality of the seeds. Allow the seeds to air dry for about two to three days or until they’re completely dry and crispy.

Once dried, transfer the seeds to an airtight container to prevent moisture and pests from entering. For long term storage, store the container in a cool, dark place, such as a pantry or refrigerator. This will help maintain the freshness and nutritional value of the chia seeds for up to two years. Remember to label the container with the date of harvest to keep track of their freshness.

chia seeds benefits

Frequently Asked Questions

Can Chia Seeds Be Harvested From Any Type of Chia Plant?

Yes, chia seeds can be harvested from any type of chia plant. However, there are challenges in chia seed cultivation, but the benefits of harvesting them at their peak ripeness outweigh the difficulties.

Advertisement

How Long Does It Take for Chia Seeds to Ripen From the Time of Flowering?

When is the best time to harvest chia seeds? How do you know if chia seeds are ready to be harvested? It usually takes about 2-3 weeks for chia seeds to ripen from the time of flowering.

Are There Any Specific Tools or Equipment Required for Harvesting Chia Seeds by Hand?

When harvesting chia seeds by hand, there are a few essential tools that can make the process easier. Some common tools include a mesh screen, a bucket, and a pair of gloves. These tools help prevent common mistakes and ensure successful harvesting techniques.

Can Chia Seeds Be Harvested in Multiple Stages, or Is It Best to Wait Until All Seeds Are Fully Ripened?

Yes, chia seeds can be harvested in multiple stages. However, it is best to wait until all seeds are fully ripened for optimal flavor and nutritional value. Patience and timing are key in successful chia seed harvesting.

chia seeds amazon

To ensure freshness and longevity, store chia seeds in an airtight container in a cool, dry place. This preserves their nutritional benefits and extends their shelf life. Incorporating chia seeds in recipes adds a healthy boost to your meals.

Conclusion

In conclusion, successfully harvesting chia seeds requires careful timing, keen observation, and proper preparation. By waiting for the right moment when the seeds are fully ripe and easily detach from the plant, you can ensure a bountiful harvest.

Advertisement

Gently handpicking the seeds and allowing them to dry thoroughly will guarantee their longevity. So, venture into your garden, let the vibrant chia plants guide you, and enjoy the satisfaction of a well-harvested crop.

Continue Reading

Growing and Harvesting Chia Seeds

Your Complete Guide to Growing Chia Seeds Indoors

Published

on

By

Welcome to our detailed guide on growing chia seeds indoors! We are thrilled to help you learn how to successfully cultivate these healthy superfoods in the comfort of your own home.

With our step-by-step instructions and expert tips, you’ll learn everything from choosing the right chia seeds and creating the perfect growing environment to nurturing your seedlings and harvesting the bountiful rewards.

Get ready to embark on a journey of self-sufficiency and health as we serve you the knowledge you need to grow chia seeds like a pro.

Key Takeaways

  • Select high-quality chia seeds labeled as ‘sprouting’ or ‘germinating’
  • Create an ideal growing environment with optimal light conditions and temperature range
  • Regularly water and care for chia seedlings, addressing any issues promptly
  • Harvest and store chia seeds properly, and incorporate them into a healthy diet for their numerous benefits

Choosing the Right Chia Seeds

We need to select the appropriate quantity of chia seeds for optimal indoor growth. When selecting high quality chia seeds, it’s important to understand the various varieties available.

how to drink chia seeds

There are two main types of chia seeds: black and white. Black chia seeds are the most common variety and have a mild, nutty flavor. White chia seeds, on the other hand, are slightly milder in taste and have a more subtle flavor profile.

Advertisement

It’s recommended to choose organic chia seeds, as they’re grown without the use of harmful pesticides or synthetic fertilizers. Additionally, look for chia seeds that are labeled as ‘sprouting’ or ‘germinating,’ as these have a higher germination rate and are more likely to produce healthy plants.

Setting up the Ideal Growing Environment

To create the ideal growing environment for your chia seeds indoors, it’s important to consider factors such as temperature, lighting, and moisture levels.

Start by creating a DIY chia seed sprouting tray. You can easily make one by using a shallow container with drainage holes and filling it with a mixture of potting soil and compost.

chia seeds nutrition

Optimize light conditions by placing the tray near a south-facing window or using artificial grow lights. Chia seeds require about 12-14 hours of light per day for optimal growth.

Maintain a temperature range of 65-75°F (18-24°C) during the day and slightly cooler at night.

Advertisement

Make sure to keep the soil consistently moist, but not waterlogged, by watering regularly or using a spray bottle.

With the right environment, your chia seeds will thrive and provide you with nutritious sprouts.

chia seeds in water benefits for hair

Planting and Germinating Chia Seeds

Once you have set up the ideal growing environment for your chia seeds indoors, it’s time to move on to planting and germinating the seeds. To germinate chia seeds indoors, start by soaking them in water for about 20 minutes. Then, spread the seeds evenly on a damp paper towel or a seedling tray filled with moist seed-starting mix. Cover the seeds with another layer of moist paper towel or seed-starting mix, ensuring they aren’t exposed to direct sunlight. Maintain a consistent temperature of around 70-75°F (21-24°C) and keep the seeds moist by misting them regularly. Germination usually takes about 7-10 days.

If you encounter any issues during germination, such as mold growth or slow germination, it’s important to troubleshoot the problem. Ensure proper air circulation, avoid overwatering, and provide adequate light without direct exposure to intense sunlight. Additionally, check the quality of your seeds and consider using fresh ones if necessary.

Transitioning into the subsequent section about nurturing and caring for chia seedlings, it’s important to continue providing the right conditions for their growth.

Advertisement

Nurturing and Caring for Chia Seedlings

After germination, it’s essential to provide optimal care and nourishment for your chia seedlings. A consistent watering schedule is crucial to ensure their healthy growth. Chia seedlings thrive in moist soil, so it’s important to keep the soil evenly moist but not waterlogged. Watering them once a day is typically sufficient, but adjustments may be needed based on the humidity levels in your environment.

chia seeds recipes easy

It’s important to monitor the moisture level of the soil regularly and adjust the watering schedule accordingly. Overwatering can lead to root rot, while underwatering can cause stunted growth or wilting. Additionally, it’s important to troubleshoot common issues such as nutrient deficiencies, pests, or diseases that may affect the health of your chia seedlings. Regular inspection and prompt action can help ensure their successful growth.

Harvesting and Storing Chia Seeds

Continuing the care and nourishment of our chia seedlings, we now turn our attention to the important task of harvesting and storing the chia seeds.

Harvesting chia seeds is a straightforward process that requires a few simple steps. Here’s how you can do it:

  • Wait for the chia plant to fully mature. The seeds are ready for harvest when the flowers have dried and the seed heads have turned brown.
  • Gently cut the seed heads from the plant using pruning shears. Place the seed heads in a paper bag to catch any loose seeds that may fall during the process.

Processing chia seeds involves drying and cleaning them before storage. Here’s what you need to do:

chia seeds benefits in hindi

  • Spread the harvested seed heads on a clean, dry surface and allow them to dry completely for a few days.
  • Once the seeds are dry, gently rub the seed heads between your hands to separate the seeds from the chaff.
  • Store the dried chia seeds in an airtight container in a cool, dark place to maintain their freshness.

Consuming chia seeds has numerous benefits, including their high fiber and omega-3 fatty acid content. They can be added to smoothies, yogurt, or baked goods for a nutritious boost.

Frequently Asked Questions

Can I Grow Chia Seeds Outdoors Instead of Indoors?

Growing chia seeds outdoors instead of indoors has its own benefits and drawbacks. While outdoor gardening allows for natural sunlight and more space, it also exposes the seeds to unpredictable weather conditions and pests.

Advertisement

How Long Does It Take for Chia Seeds to Germinate?

Chia seeds typically take 7-10 days to germinate. To speed up germination, soak the seeds in water for a few hours before planting. Ensure a warm temperature and moist soil for optimal growth.

Can I Use Regular Potting Soil to Grow Chia Seeds?

Yes, regular potting soil can be used for growing chia seeds. However, using specialized soil mixtures specifically designed for chia seeds can provide better results. These mixtures offer optimal drainage and nutrient content for successful chia seed growth.

chia seeds health benefits for women

Do I Need to Use Fertilizer When Growing Chia Seeds Indoors?

Yes, fertilizer is necessary for growing chia seeds indoors. While there are alternative growing methods, using fertilizer ensures optimal growth and nutrient uptake. It promotes healthier plants and higher yields, leading to a more successful chia seed cultivation experience.

What Are Some Common Pests or Diseases That Affect Chia Seedlings?

Common pests affecting chia seedlings include aphids, spider mites, and fungus gnats. Diseases that can affect chia seedlings include damping-off, root rot, and powdery mildew. Proper care, such as regular monitoring and maintaining optimal growing conditions, can help prevent and manage these issues.

Conclusion

In conclusion, growing chia seeds indoors can be a rewarding and fulfilling experience.

Advertisement

By choosing the right chia seeds, creating the ideal growing environment, and providing proper care, you can successfully cultivate chia seedlings.

chia seeds hydration

Remember to harvest the seeds at the right time and store them properly to ensure their freshness and longevity.

With a little patience and dedication, you can enjoy the nutritional benefits of chia seeds right from the comfort of your own home.

Continue Reading

Growing and Harvesting Chia Seeds

Why Should We Harvest Seeds for Consuming?

Published

on

By

Have you ever wondered **why collecting seeds is important**? Find out the surprising benefits and secrets about the value of gathering seeds in your daily life. Learn about the advantages of consuming seeds and how they can boost your health. Keep reading to discover how simple seeds can make a big difference in your well-being.

We often overlook the nutritional benefits of freshly harvested seeds. At our fingertips, we have a wealth of nutrients waiting to be unlocked.

In this article, we will explore the health benefits and nutritional value of harvesting chia seeds. We will also provide tips for growing and harvesting these seeds sustainably.

Join us as we discover delicious recipes that utilize the goodness of freshly harvested chia seeds. Let’s nourish ourselves and serve others through the power of seeds.

Advertisement

chia seeds benefits in hindi

Key Takeaways

  • Harvesting seeds for consuming allows us to access the health benefits and nutritional value they provide.
  • Seeds, such as chia seeds, are considered superfoods due to their impressive nutrient profile.
  • Chia seeds are rich in omega-3 fatty acids, antioxidants, fiber, protein, and various vitamins and minerals.
  • Regular consumption of chia seeds may promote overall well-being, including a healthy gut, brain health, reduced inflammation, and weight management.

Health Benefits of Harvesting Chia Seeds

The health benefits of harvesting chia seeds are numerous and can greatly contribute to our overall well-being. When it comes to potential side effects, chia seeds are generally safe for consumption. However, some individuals may experience digestive issues such as bloating or gas due to the high fiber content of chia seeds. It’s important to start with small portions and gradually increase intake to avoid discomfort.

In terms of nutritional benefits, chia seeds are considered a superfood due to their impressive nutrient profile. They’re rich in omega-3 fatty acids, antioxidants, fiber, protein, and various vitamins and minerals. Comparing chia seeds to other superfoods, they stand out for their high omega-3 content, which is essential for brain health and reducing inflammation. Chia seeds also provide a good amount of calcium, iron, and magnesium, which are important for bone health, energy production, and muscle function.

Understanding the potential side effects and the nutritional benefits of chia seeds sets the stage for exploring the exceptional nutritional value of freshly harvested chia seeds.

Nutritional Value of Freshly Harvested Chia Seeds

When harvesting seeds for consumption, we can benefit from the exceptional nutritional value of freshly harvested chia seeds. Chia seeds are packed with essential nutrients that can contribute to a balanced and healthy diet.

chia seeds health benefits and side effects

These tiny seeds are an excellent source of omega-3 fatty acids, fiber, protein, and antioxidants. Omega-3 fatty acids are known to support heart health and reduce inflammation. Fiber aids in digestion and helps regulate blood sugar levels. Protein is essential for muscle growth and repair. Antioxidants protect the body against free radicals and oxidative stress.

To preserve the nutritional benefits of chia seeds, it’s important to store them properly. Keep them in an airtight container in a cool, dry place away from direct sunlight. This will ensure the longevity of their nutritional value.

Advertisement

Tips for Growing and Harvesting Chia Seeds

To successfully grow and harvest chia seeds, we recommend using a well-draining soil mixture.

Here are three essential tips for growing and harvesting chia seeds:

chia seeds nutrition 1 tbsp

  1. Sowing and Germination: Chia seeds should be sown in late spring or early summer, when the soil temperature reaches around 70°F (21°C). Prepare the soil by loosening it and removing any weeds. Sow the seeds evenly and cover them with a thin layer of soil. Water the area lightly, ensuring the soil remains consistently moist until germination occurs, which usually takes about two weeks.

  2. Watering and Maintenance: Chia plants require regular watering but be cautious not to overwater, as excessive moisture can cause the seeds to rot. Water the plants when the top inch of soil feels dry. Additionally, removing weeds and providing support for the tall-growing chia plants is important for their optimal growth.

  3. Harvesting and Storage: Chia seeds are ready for harvest when the plants have dried out and turned brown. Cut the plants at the base and hang them upside down in a well-ventilated area to allow the seeds to fully dry. Once dry, gently rub the seed heads to release the seeds. Store the harvested seeds in an airtight container in a cool, dry place to maintain their freshness and nutritional value.

Sustainable Farming Practices for Chia Seed Harvesting

Now let’s delve into sustainable farming practices for chia seed harvesting, focusing on our commitment to environmentally friendly cultivation methods.

how to eat chia seeds

Sustainable agriculture is at the core of our approach, as we strive to minimize our environmental impact while producing high-quality chia seeds. One key practice we implement is crop rotation, which helps to maintain soil health and prevent the buildup of pests and diseases.

We also prioritize water conservation by utilizing efficient irrigation systems and monitoring soil moisture levels. Additionally, we employ natural pest control methods, such as beneficial insects and companion planting, to reduce the need for harmful pesticides.

Advertisement

By implementing these sustainable farming practices, we can ensure the long-term viability of chia seed production while minimizing our impact on the environment.

Now, let’s move on to the next section to explore delicious recipes using freshly harvested chia seeds.

chia seeds benefits and side effects

Delicious Recipes Using Freshly Harvested Chia Seeds

Let’s explore some mouthwatering recipes that feature our freshly harvested chia seeds. Chia seeds aren’t only nutritious but also incredibly versatile in the kitchen. Here are three delightful ways to incorporate them into your meals:

  1. Chia Seed Smoothie Recipes: Start your day with a refreshing and nutrient-packed smoothie. Blend together a ripe banana, a handful of berries, a tablespoon of chia seeds, and your favorite plant-based milk. This smoothie will provide you with a boost of energy and keep you feeling satisfied throughout the morning.

  2. Chia Seed Pudding Variations: For a delicious and healthy dessert, try making chia seed pudding. Combine chia seeds with your choice of milk, a touch of sweetener, and any desired flavorings such as vanilla extract or cocoa powder. Let it sit in the fridge overnight, and wake up to a creamy and indulgent treat.

  3. Chia Seed Energy Balls: These bite-sized snacks are perfect for on-the-go or as a post-workout refuel. Mix together chia seeds, nut butter, honey, and your favorite nuts or dried fruits. Form into small balls and refrigerate until firm. Enjoy these nutritious treats whenever you need a quick pick-me-up.

    chia seeds side effects heart

With these recipes, you can enjoy the health benefits of chia seeds while satisfying your taste buds. So go ahead and start experimenting in the kitchen with these delightful chia seed creations.

Frequently Asked Questions

How Long Do Chia Seeds Stay Fresh After Harvesting?

Chia seeds can stay fresh for a long time after harvesting, making them ideal for long term storage. They offer numerous nutritional benefits, including high fiber, omega-3 fatty acids, and antioxidants.

Are There Any Potential Side Effects or Allergic Reactions From Consuming Freshly Harvested Chia Seeds?

Potential side effects or allergic reactions from consuming freshly harvested chia seeds are rare, but precautions should be taken. Comparing nutritional benefits, fresh seeds retain more nutrients and antioxidants than store-bought ones.

Advertisement

Can I Harvest Chia Seeds From Plants Grown Indoors?

Yes, we can harvest chia seeds from indoor plants. By providing proper care to indoor chia plants, we can ensure a good yield of seeds. Eating chia seeds offers numerous benefits, including improved digestion and heart health.

chia seeds morrisons

Are There Any Specific Tools or Equipment Needed for Harvesting Chia Seeds?

When harvesting chia seeds indoors, there are a few tools and equipment that can help. Tips for successful chia seed harvesting include using a fine-mesh sieve, a clean and dry container, and gently shaking the plants to release the seeds.

Can I Store Harvested Chia Seeds for a Long Period of Time?

Yes, we can store harvested chia seeds for a long time. However, consuming fresh chia seeds has numerous benefits. Storing them properly ensures their nutritional value and extends their shelf life.

Conclusion

In conclusion, the act of harvesting seeds for consumption is akin to reaping the fruits of our labor in the field of health. Just as a diligent farmer tends to their crops to ensure a bountiful harvest, we too can cultivate a healthier lifestyle by incorporating freshly harvested chia seeds into our diets.

With their abundant nutritional value and numerous health benefits, these tiny powerhouses can nourish our bodies and contribute to our overall well-being. So let’s embrace the art of seed harvesting and savor the rewards it brings.

Advertisement

are chia seeds good for you

Continue Reading
Advertisement

Affiliate disclaimer
As an affiliate, we may earn a commission from qualifying purchases. We get commissions for purchases made through links on this website from Amazon and other third parties.

Advertisement

Trending