
Use a garden soil test kit to check your soil’s pH and, when the kit supports it, nutrient levels such as nitrogen, phosphorus, and potassium. This beginner guide shows home gardeners how to collect a representative sample, run the test, read the result, and decide what to do next. Set aside about 45–90 minutes for sampling and testing; some kits require additional waiting time.

Get garden gear delivered free with Prime
- Fast, free delivery on millions of items
- Prime Video, Amazon Music and more included
- Member-only deals all year
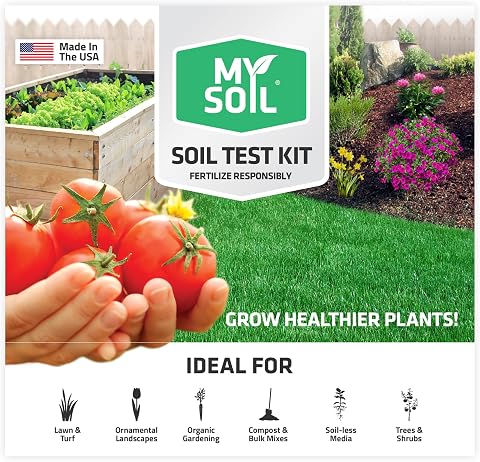
MySoil Soil Test Kit with Nutrient and pH Analysis
- ✔ Test method: Mail-in professional lab analysis
- ✔ Nutrient coverage: 13 plant-available nutrient levels, including nitrogen and pH
- ✔ Results time: 6–8 days

Soil Test Kit, 140 Tests for pH and Nutrient Levels
- ✔ Test method: Liquid soil test
- ✔ Parameters: pH, ammonia, nitrogen, phosphorus, and potassium
- ✔ Approximate total tests: 140
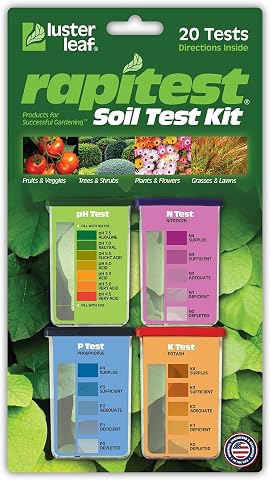
Rapitest Soil Test Kit for Gardens and Lawns
- ✔ Brand: Luster Leaf
- ✔ Model: 1602
- ✔ Tests included: 20 total: five each for pH, nitrogen, phosphorus, and potash
Difficulty: Beginner | Time: 45–90 minutes, plus any kit-specific waiting time
What You’ll Need
Tools & Materials:
- Garden soil test kit with instructions and unexpired reagents or test strips
- Clean trowel or soil probe
- Clean bucket or container for mixing samples
- Clean spoon or scoop
- Water specified by the kit, often distilled or deionized
- Pen and paper or a phone for recording results
Knowledge:
- Ability to identify the garden bed or lawn area you want to test
- Ability to follow the kit’s instructions and compare colors with its chart
Read the kit instructions before collecting soil. Kits differ in sample amounts, water requirements, mixing times, and color-reading windows. Test separate areas with different plants, soil, drainage, or past fertilizer use separately. For a large garden, divide it into areas that are managed in the same way.
MySoil Soil Test Kit with Nutrient and pH Analysis
When we want a fuller picture of soil fertility before making amendments, MySoil’s lab analysis offers the broadest nutrient coverage in this lineup: 13 plant-available nutrient levels, including nitrogen and pH. That makes it a stronger fit for gardeners facing several unknowns than Rapitest, which checks pH, nitrogen, phosphorus, and potash at home. The report also includes recommendations on what to apply, how much, and when, with organic and non-organic options. This extra interpretation can help turn results into an action plan instead of leaving us to translate readings ourselves.The process brings a different kind of tradeoff. We collect one sample, send it using the prepaid envelope, and wait 6–8 days for results. Unlike the liquid kit, this is not designed for a series of quick checks across changing beds: it is a single-use kit. Its wide suitability, including lawns, compost, houseplants, and hydroponics, gives it flexibility, but buyers who mainly want frequent monitoring may get more practical use from the liquid kit’s larger supply. Choose MySoil when detailed analysis and specific application guidance justify the wait; skip it when repeat tests or same-session answers are central.
Pros:
- Lab analysis covers 13 plant-available nutrient levels, including nitrogen and pH.
- Recommendations include what to apply, how much, and when.
- Offers organic and non-organic amendment guidance.
- Prepaid mailing envelope and instructions are included.
Cons:
- The kit is single-use.
- Results take 6–8 days after the sample is sent.
Best for: Gardeners who want a one-time, broad lab analysis with recommendations for how much to apply and when.
Not ideal for: People who need immediate results or expect to test several areas repeatedly with one kit.
Bottom line: We recommend MySoil when breadth and tailored lab guidance matter more than repeat testing or speed.
“We recommend MySoil when breadth and tailored lab guidance matter more than repeat testing or speed.”
Soil Test Kit, 140 Tests for pH and Nutrient Levels
For gardeners who expect to check more than one bed or revisit soil through the season, this liquid kit has the largest stated testing supply here, at approximately 140 tests. It measures pH, ammonia, nitrogen, phosphorus, and potassium, adding ammonia to the set of parameters covered by Rapitest. That makes it the more flexible home-monitoring choice for routine checks and for users who also work with lawns, compost, or hydroponics. Compared with MySoil, it trades a mailed lab report and tailored application plan for the ability to run tests yourself.The headline count needs context: the kit provides about 40 tests per parameter and about 20 for nitrogen, so we should not assume every reading can be repeated equally often. The product information also stresses that results depend on following instructions correctly. That puts more responsibility on us than MySoil’s lab process, and it may feel less guided than Rapitest’s included plant preference list. Choose this option for repeat testing across several settings, especially if you are comfortable following a procedure. If you want specific amendment amounts and timing, MySoil offers more interpretation; if you need simpler plant-oriented guidance, Rapitest may be easier to navigate.
Pros:
- Measures pH, ammonia, nitrogen, phosphorus, and potassium.
- Approximately 140 tests support routine monitoring.
- Can be used with gardens, lawns, compost, and hydroponics.
- Results can help inform fertilizer choices.
Cons:
- Correct procedure is important to getting results.
- Test quantities vary by parameter, with about 20 nitrogen tests and about 40 for each other parameter.
Best for: Gardeners who want a substantial supply for repeated checks across garden beds, lawns, compost, or hydroponic setups.
Not ideal for: Buyers who prefer a lab report with tailored amendment instructions or need detailed guidance on applying results.
Bottom line: We see this as the most practical choice for repeated home checks, provided we follow the instructions and plan around uneven test counts.
“We see this as the most practical choice for repeated home checks, provided we follow the instructions and plan around uneven test counts.”
Rapitest Soil Test Kit for Gardens and Lawns
Rapitest focuses on the measurements many gardeners want to check first: pH, nitrogen, phosphorus, and potash. Its capsule system and color comparator let us test at home, while the included preference list and recommendations for more than 400 plants help connect results to growing choices. That guidance gives it a more approachable feel than the liquid kit, whose instructions require careful execution but whose supplied details do not describe a comparable plant list. For someone working out whether common garden soil conditions suit a crop, Rapitest keeps the task focused.Its limits are just as clear. There are five tests per variable, so it is better for occasional checks than ongoing tracking across many beds. Results also rely on visually comparing colors, which puts interpretation in the user’s hands. MySoil costs us the wait and the one-time sample process but measures far more nutrient levels and supplies tailored recommendations; the 140-test kit is the stronger pick when testing volume is the priority. Rapitest makes most sense when we want familiar home measurements plus plant-specific reference guidance, and less sense for detailed diagnosis or frequent testing.
Pros:
- Tests pH, nitrogen, phosphorus, and potash.
- Includes supplies for 20 tests, with five per variable.
- Color comparators support at-home result interpretation.
- Plant preference list and recommendations cover more than 400 plants.
Cons:
- Only five tests are provided for each soil variable.
- Results depend on visual color comparisons.
Best for: Home gardeners who want to check pH and three key nutrients and consult plant preference guidance.
Not ideal for: Gardeners seeking detailed lab analysis or enough tests for frequent monitoring across many areas.
Bottom line: We recommend Rapitest as a focused, guided starting point for common garden soil checks, rather than a high-volume or detailed diagnostic kit.
“We recommend Rapitest as a focused, guided starting point for common garden soil checks, rather than a high-volume or detailed diagnostic kit.”
As an Amazon Associate we earn from qualifying purchases.
Before You Start
Choose a time when the soil is workable, not waterlogged or frozen. If you recently applied fertilizer, lime, compost, or another amendment, check the kit or laboratory guidance for a suitable wait before sampling; a fresh application can distort the result. Avoid sampling beside compost piles, recently fertilized patches, paths, foundations, or other unusual spots unless that specific spot is what you want to test. Wear gloves if the soil may contain contaminants, and wash your hands after handling soil or reagents.
A home kit gives a useful screening result, but its accuracy depends on sampling and following its method. If you need a precise recommendation, suspect contamination, or get results that do not match plant performance, use a soil testing laboratory.
Step-by-Step Instructions
Step 1: Choose the area to test
Select one garden bed, lawn section, or other area with similar soil and management. Keep areas separate if they have different crops, drainage, fertilizer history, or visible soil conditions. Record the area’s name so you can match the results to it later.
Tip:Do not combine vegetable beds with lawn soil or a wet corner with a well-drained bed. A mixed sample can hide local differences.
Check: You have one clearly defined area and a label for its sample.
Step 2: Collect several soil cores
Remove surface mulch, leaves, and grass at each sampling point. Take 5–10 small samples from evenly spaced spots across the area, using the depth recommended by your kit. For many garden beds, sampling the cultivated root zone—often about 4–6 inches deep—is appropriate, but follow the kit’s directions. Put each core into the clean bucket.
Tip:Use the same depth at every point. Avoid unusual spots such as compost heaps, fertilizer bands, paths, and areas beside buildings unless you intend to test them specifically.
Check: The bucket contains soil from multiple representative locations at a consistent depth.
Step 3: Mix and prepare the sample
Break apart clumps and remove stones, roots, and plant debris. Mix the soil thoroughly in the bucket. Measure the amount needed for the kit, then let it air-dry if the instructions require dry soil. Do not heat it to dry it; heat can change some soil properties.
Tip:If the soil is very wet, spread it in a thin layer on a clean tray in a protected place. Keep it away from fertilizer, cleaners, and other materials that could contaminate it.
Check: You have a uniform sample prepared in the condition and quantity specified by the kit.
Step 4: Set up the test materials
Place the kit, sample, clean utensils, and required water on a stable surface. Check the kit’s expiry date and identify which chamber, strip, or reagent corresponds to each measurement. Read the instructions for the exact sample-to-water ratio, mixing method, and waiting time.
Tip:Use distilled or deionized water only if the instructions specify it. Tap water can affect some readings.
Check: You can identify the test procedure and have every required item ready before opening or mixing reagents.
Step 5: Run each soil test
Measure the soil and water exactly as directed. Add the specified reagent or test strip, close or mix the container as instructed, and start a timer if a waiting period applies. Run pH and nutrient tests separately when the kit provides separate procedures. Keep test chambers level and avoid touching reagent-treated areas.
Tip:Do not guess at quantities or read a strip outside its stated time window. Both can shift the color and lead to a misleading result.
Check: Each test has been prepared with the specified amounts and has completed its required reaction time.
Step 6: Read and record the results
Compare each test’s color with the matching chart under bright, neutral light. Hold strips against the chart as directed and read them within the stated time window. Record the pH and each nutrient result, including the kit’s category or range, the area tested, the date, and any unclear reading.
Tip:Colors can be difficult to distinguish. If a result falls between two chart values, record it as a range rather than choosing a more precise number than the kit supports.
Check: Your notes show a dated result for every measurement, linked to the correct garden area.
Step 7: Use the results to plan a response
Compare the readings with the kit’s guidance and the needs of the plants in that area. Follow a recommended amendment rate only when the kit gives a clear rate for your soil and garden size. Measure the area before applying anything, and avoid adding a nutrient or pH amendment solely because a reading looks low or high without checking the instructions.
Tip:Home kits provide screening information, and product rates vary. For large pH changes, persistent plant problems, or a result outside the kit’s chart, request a laboratory test or local horticultural advice before applying substantial amendments.
Check: You have recorded a specific, measured next action—or decided to gather a more reliable test before changing the soil.
Common Mistakes to Avoid
- Taking one scoop from a single spot and treating it as the whole bed. — Collect several evenly spaced cores from the same managed area and mix them before testing.
- Sampling soon after fertilizer or lime has been applied. — Check the kit or laboratory guidance for timing, and note recent amendments when interpreting results.
- Using a different soil depth or sample amount than the instructions specify. — Use a consistent sampling depth and measure soil and water with the kit’s stated method.
- Applying a large amount of amendment based on a color that is hard to read. — Record ambiguous values as a range and get a laboratory result or local recommendation before making a substantial change.
Troubleshooting
Problem: The test color does not match any chart value clearly.
Solution: Check the color in bright, neutral light and confirm that you are using the correct chart and reading within the stated time. Record a range if it remains between values; repeat with fresh soil if the kit allows.
Problem: The kit gives a different result when you repeat the test.
Solution: Mix the sample again, use clean utensils, and measure the soil and water carefully. Repeat with fresh reagents or strips that are within date. Large differences may call for a laboratory test.
Problem: The soil sample is muddy or will not mix as directed.
Solution: Let it drain or air-dry if the kit requires dry soil, then prepare a new measured portion. Do not add extra water unless the instructions call for it.
Problem: The result seems inconsistent with plant growth or the garden’s history.
Solution: Check that the sample represents the affected area and that no recent amendment skewed it. Keep the result for reference and request a laboratory test for a more dependable diagnosis.
What Success Looks Like
You have a recorded pH and any nutrient readings supported by your kit, each tied to a named garden area and sampling date. The sample came from several representative points at a consistent depth, and the test followed the kit’s amounts and timing. You have a measured, plant-appropriate next action or a clear reason to seek a laboratory test before changing the soil.
Next Steps
Keep the result with your garden notes and record any amendment, amount, and application date. Follow product directions when making a change, and avoid stacking several amendments without guidance. Retest at the interval recommended by the kit, laboratory, or local extension service, or when a persistent problem warrants a fresh measurement. Dispose of used reagents and strips according to the kit label, clean reusable tools, and wash your hands.
Frequently Asked Questions
How many soil samples should I combine for one garden bed?
Collect about 5–10 small cores from evenly spaced points in a uniform area, unless your kit specifies another number. Mix them into one composite sample. Test areas with different soil or management separately.
Can I use a home kit to test garden soil after fertilizing?
A recent fertilizer application can affect nutrient readings. Follow the timing guidance supplied with the kit or ask a soil laboratory when to sample. Note the product and application date in your records.
Do I need distilled water?
Use the water type specified by your kit. Some tests call for distilled or deionized water because minerals in tap water can affect the reading; others include their own solution.
What should I do if my kit does not test for a nutrient I need?
Do not infer that nutrient’s level from pH or another result. Send a representative sample to a soil testing laboratory and request the specific measurement and crop-appropriate recommendations.
How often should I test my garden soil?
Follow the kit or laboratory’s retesting guidance. Retest after a meaningful soil amendment or when a recurring plant problem needs investigation, allowing enough time for the change to affect the soil.