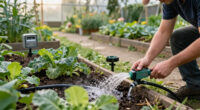
Set up an automated garden watering system that waters the right areas on a schedule and lets you check that plants receive enough moisture. This guide is for home gardeners with basic tool skills; no electrical or plumbing experience is needed for a simple hose-connected system. Allow 2–4 hours for planning and installation, then observe the garden over several days and adjust the schedule.

Get garden gear delivered free with Prime
- Fast, free delivery on millions of items
- Prime Video, Amazon Music and more included
- Member-only deals all year

GoveeLife H5901 Smart WiFi Sprinkler Timer with Gateway, 1 Outlet
- ✔ Brand: GoveeLife
- ✔ Model: H5901+H5044
- ✔ Water outlets: 1
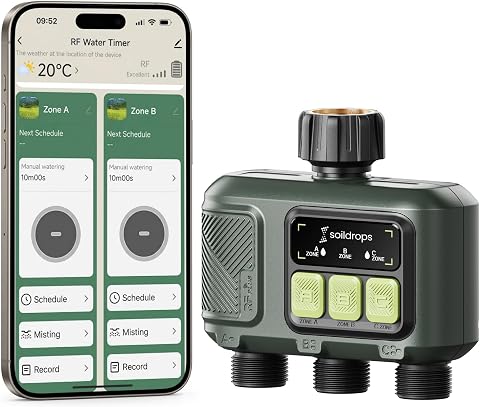
WiFi Water Timer Smart Irrigation Controller with Gateway
- ✔ Brand: Soildrops
- ✔ Model: WHT-003
- ✔ Power: 2 AA batteries

MOES 4 Zone Water Timer, Brass Fittings, Sequential Watering, No Wi-Fi
- ✔ Brand: MOES
- ✔ Model: CR04
- ✔ Zones: Up to 4
Difficulty: Beginner | Time: 2–4 hours, plus several days to observe and adjust
What You’ll Need
Tools & Materials:
- Hose-compatible irrigation timer or controller
- Drip tubing or soaker hose, sized for the garden
- Compatible fittings, connectors, and end caps
- Drippers or emitters suited to the plants
- Filter and pressure regulator if required by the irrigation system
- Measuring tape, scissors or tubing cutter, and garden stakes
- Optional soil moisture sensor
Knowledge:
- Basic ability to connect a hose and cut flexible tubing
- Ability to group plants with similar watering needs
Check the controller and tubing instructions for compatible water pressure, fittings, and outdoor use. Confirm that the outdoor tap works and that you can reach every planting area. Keep the controller and any plugs away from standing water, and use outdoor-rated electrical equipment where applicable.
GoveeLife H5901 Smart WiFi Sprinkler Timer with Gateway, 1 Outlet
For gardeners who want their watering routine managed from a phone, the GoveeLife H5901 offers the broadest connected toolkit in this comparison. Its gateway links the single-outlet timer to app-based remote control, while weather-adaptive watering can adjust the schedule using rain and weather data. That may reduce the need to intervene after a change in conditions. The app’s charts for watering time and volume also give us a clearer record of how the routine is running than the product details supplied for Soildrops or MOES.GoveeLife is the strongest fit when one outlet covers the immediate need and convenience is the priority. It supports up to 10 schedules, three watering modes, and Alexa and Google Assistant, while the Soildrops timer emphasizes long-range RF communication and flexible scheduling. MOES goes further on zone count, with four zones from one faucet, but it leaves app access behind. GoveeLife’s brass inlets, IP67 rating, and UV-stabilized shell are useful design details for equipment installed outdoors; its stated two-year battery life also means fewer expected battery changes than the Soildrops unit’s stated eight months, though actual life can depend on use and conditions.The tradeoff is that this remains a one-outlet system, not a four-zone controller. It also needs a gateway on 2.4 GHz Wi-Fi, a compatible 3/4-inch threaded connection, and sufficient water pressure within its stated operating range. Buyers with weak water pressure, another connector size, or a multi-zone layout may be better served by MOES or by a system matched to their plumbing. Compared with Soildrops, GoveeLife offers more explicitly described app and voice features, while Soildrops claims greater RF range than GoveeLife’s stated gateway range.
Pros:
- Weather-adaptive watering can adjust schedules using rain and weather data.
- Up to 10 schedules and three watering modes support different routines.
- IP67 waterproofing, UV-stabilized shell, and dual brass inlets are designed for outdoor installation.
- App charts and Alexa or Google Assistant support add monitoring and convenient control.
Cons:
- Controls one water outlet, while MOES supports four zones from one faucet.
- Gateway connectivity is specified for 2.4 GHz Wi-Fi.
- Requires a compatible 3/4-inch threaded connection and sufficient operating water pressure.
Best for: Gardeners who want remote app control, weather-adaptive watering, usage charts, and voice-assistant support for a single faucet outlet.
Not ideal for: Buyers who need four separately controlled zones, do not have 2.4 GHz Wi-Fi, use a different connection size, or cannot meet the stated operating pressure range.
Bottom line: Choose GoveeLife when a connected, weather-aware single-outlet routine matters more than controlling several zones from one faucet.
“Choose GoveeLife when a connected, weather-aware single-outlet routine matters more than controlling several zones from one faucet.”
WiFi Water Timer Smart Irrigation Controller with Gateway
The Soildrops WHT-003 is built around a particular garden problem: the timer needs to communicate across a larger yard or beyond the reach of a nearby connection. Its stated 984-foot RF range gives it a clear role beside GoveeLife, which lists a gateway range of up to 1,640 feet; those figures are product specifications rather than a guarantee of real-world coverage, which can vary with obstacles and placement. Soildrops also runs on two AA batteries for a stated up to eight months, avoiding the need for wiring at the timer.For scheduling, the supplied details describe daily, interval, and odd/even modes, plus weather delay to skip watering during rain. That is a practical mix for gardeners who want a repeating routine with some flexibility, without needing GoveeLife’s specified app charts or voice-assistant integration. The system supports up to 64 devices per gateway and OTA updates, so the setup can accommodate more than one compatible device while remaining dependent on its gateway. AES-128 encryption is also listed as a security feature.Compared with MOES, Soildrops adds remote app control but gives up the explicitly stated four-zone faucet control and local LCD programming. Compared with GoveeLife, it offers less detail about outdoor construction and connected extras, and its eight-month battery life means more frequent planned battery replacement than GoveeLife’s stated two years. Buyers should choose it for the wireless range and schedule flexibility, not assume that its listed range alone solves every garden coverage issue. The supplied information does not specify the number of water outlets or connector details, so those should be checked against the intended installation before purchase.
Pros:
- Stated RF range of up to 984 feet can suit installations where the timer is far from its gateway.
- Battery-powered operation avoids wiring at the timer.
- Weather delay and daily, interval, and odd/even scheduling support flexible routines.
- Gateway supports up to 64 devices and the system lists OTA updates and AES-128 encryption.
Cons:
- Two AA batteries have a stated life of up to eight months and need periodic replacement.
- A gateway is required for connected control, and the gateway limit is 64 devices.
- Supplied details do not establish outlet count or connection compatibility.
Best for: Gardeners who need app-based scheduling with a stated long RF range and weather delay, and who can accommodate periodic AA battery replacement.
Not ideal for: Those who want a clearly specified multi-zone faucet timer, voice control and usage charts, or detailed confirmation of outlet and connector compatibility before buying.
Bottom line: Pick Soildrops when long-range RF and flexible app scheduling are the deciding needs, after confirming the timer matches your plumbing.
“Pick Soildrops when long-range RF and flexible app scheduling are the deciding needs, after confirming the timer matches your plumbing.”
MOES 4 Zone Water Timer, Brass Fittings, Sequential Watering, No Wi-Fi
MOES makes the most sense when the goal is to automate several watering areas from a single outdoor faucet without adding a connected gateway. Its four independently scheduled zones give it a different job from the one-outlet GoveeLife, and sequential watering is designed to run zones in turn rather than create pressure conflicts by starting them together. For a garden with several beds or watering lines, that arrangement may be more useful than app charts or voice control.The large LCD keeps programming on the timer itself. MOES lists durations up to 23 hours and 59 minutes and watering frequencies up to 30 days, along with rain delay and manual watering. Battery protection is also included. This is the simplest fit for buyers who want local control and multiple zones without Wi-Fi setup. It also avoids the gateway dependency of both GoveeLife and Soildrops, though that choice means schedules and adjustments cannot be managed remotely through an app.There are meaningful limits. The timer needs four AA batteries, which are not included, and the supplied specifications do not state battery life. Unlike Soildrops, it does not offer remote connectivity; unlike GoveeLife, it does not list weather-adaptive app control, usage charts, or voice-assistant support. The description identifies brass fittings, but buyers should still verify that the unit’s connection fits their faucet and irrigation hardware. MOES ranks third overall because its compelling zone capacity serves a narrower control preference: for connected automation at one outlet, GoveeLife is more complete, and for long-range wireless access Soildrops is the clearer match.
Pros:
- Controls up to four zones from one faucet, each with its own schedule.
- Sequential watering is intended to reduce pressure conflicts between zones.
- Large LCD supports precise duration and frequency programming.
- Rain delay, manual watering, and low-battery protection are included.
Cons:
- No Wi-Fi or app connectivity, so watering cannot be managed remotely.
- Requires four AA batteries that are not included.
- The supplied specifications do not state battery life or detailed connection dimensions.
Best for: Gardeners with up to four irrigation zones sharing one faucet who prefer a local display and want to avoid Wi-Fi or gateway setup.
Not ideal for: Buyers who need remote app control, voice commands, connected weather adaptation, or a stated battery-life estimate.
Bottom line: Choose MOES when four local schedules and sequential zone operation matter more than remote access or app-based automation.
“Choose MOES when four local schedules and sequential zone operation matter more than remote access or app-based automation.”
As an Amazon Associate we earn from qualifying purchases.
Before You Start
Walk the garden and note which plants need frequent watering, which prefer drier soil, and which have different sun or soil conditions. Plan separate watering zones for groups with different needs; a single schedule may overwater some plants while leaving others dry. Check local watering restrictions and your water source. If you use a rain barrel, verify that its pressure and flow work with the selected system.
Do not bury tubing or cover emitters until you have tested the system for leaks and flow. If the tap supplies more water than the controller or tubing can handle, use the specified pressure regulator. Disconnect the water before cutting or changing fittings.
Step-by-Step Instructions
Step 1: Map plants into watering zones
Draw a simple map of the garden and mark the tap, beds, containers, and each plant group. Put plants with similar water needs and sun exposure in the same zone. Mark where tubing must branch, where each emitter should sit, and the approximate route from the water source.
Keep containers and beds with very different moisture needs on separate lines when possible. If you have only one controller outlet, use compatible tubing and emitters to create branches, then adjust flow at individual emitters if the system supports it.
Tip: Avoid placing drought-tolerant plants and thirsty vegetables on the same fixed schedule unless you can regulate their water separately.
Check: Your map shows a route to every plant group and identifies which areas need separate schedules.
Step 2: Choose and check the equipment
Select a timer or controller that fits the water source and the number of zones you planned. Choose drip tubing, soaker hose, and emitters rated to work together. Add a filter and pressure regulator when the irrigation maker requires them or the water pressure is too high.
Read the product labels for outdoor rating, connection size, maximum pressure, and sensor compatibility. If you plan to use a soil moisture sensor, check that it works with the controller and can be placed in the root zone of the plants it monitors.
Tip: A basic hose timer is usually enough for a small garden. A multi-zone controller helps when plant groups need different schedules.
Check: The controller, connectors, tubing, and emitters are compatible with one another and with your tap or water source.
Step 3: Lay out the tubing
Turn off the tap, then place the main tubing along the route on your map. Lay branch tubing beside each bed or container group. Keep tubing clear of paths, sharp edges, and places where a mower or digging tool could damage it.
Cut tubing to length with a suitable cutter or scissors. Push connectors fully into the tubing, attach end caps to open ends, and secure the lines with stakes. Position each emitter near the plant’s root area rather than against the stem.
Tip: Leave a little slack at corners and near movable containers so the lines do not pull loose when the garden shifts.
Check: Every planned plant group has a connected line, all open ends are capped, and emitters sit near the root zones.
Step 4: Connect the controller and water supply
Close the tap. Connect the filter and pressure regulator in the order stated by the irrigation instructions, then attach the timer or controller and tubing. Tighten hand-tight fittings as directed; forcing a threaded connector can damage it.
Set the controller clock and date. If the timer uses batteries, install fresh ones and check the display. For a wired controller, follow the manufacturer’s outdoor installation instructions and keep connections protected from water.
Tip: Confirm the controller’s manual watering function before setting a recurring schedule. It makes the first flow test easier to control.
Check: The controller powers on, displays the correct time, and connects securely to the water source and irrigation line.
Step 5: Flush and inspect the lines
Keep the far ends of the lines open if the system instructions call for flushing before installing emitters. Turn on the water briefly to clear dirt and debris, then close the tap and fit or reconnect the end caps and emitters.
Run a short manual watering cycle. Walk the entire route while water flows. Check each connector, branch, and emitter for leaks, blockages, or weak flow. Turn off the water before reseating a fitting or clearing an emitter.
Tip: A small amount of water at a connector may indicate a loose fitting. Persistent leaking can mean the connector is the wrong size or the tubing was cut unevenly.
Check: Water reaches every zone, emitters release water as expected, and there are no persistent leaks or disconnected lines.
Step 6: Set a starting watering schedule
Program watering days and a short starting duration for each zone, using the controller manual. Choose a time that fits local watering rules and reduces evaporation, often early morning. If the controller supports separate zone durations, set them according to plant needs and emitter flow.
Use a conservative starting schedule rather than assuming every garden needs the same duration. Soil type, weather, plant size, and emitter output all affect how quickly the root zone becomes moist. Enable a rain delay or connect a compatible rain sensor if available.
Tip: Do not use a universal number of minutes as a substitute for checking soil moisture; different tubing and emitters deliver different amounts of water.
Check: The displayed program shows the correct watering days, start time, and duration for each zone.
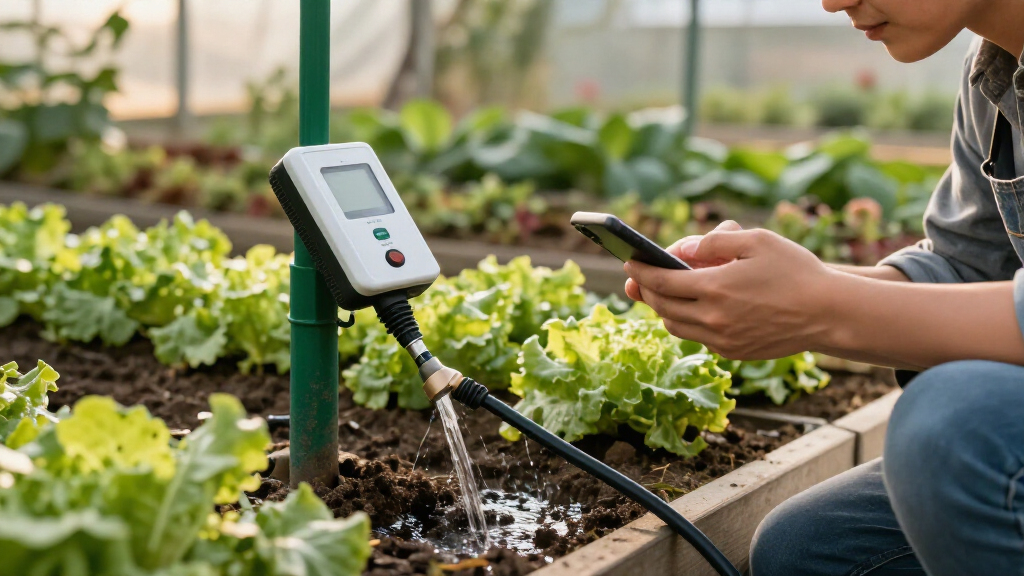
Step 7: Place and configure a moisture sensor
If you are using a soil moisture sensor, place it in the root zone of a representative plant in the zone it controls. Follow the sensor instructions for depth and orientation. Avoid putting it directly beside an emitter, where it may read unusually wet soil, or in a spot with different shade or soil conditions from the rest of the zone.
Pair the sensor with the controller and set its threshold according to the manufacturer’s guidance. Confirm that the controller receives a reading and that the sensor can pause watering when the soil is already moist, if that feature is supported.
Tip: A sensor represents only the soil around it. Use one per zone when conditions differ substantially, or check other areas by hand.
Check: The controller displays a sensor reading and responds to the sensor according to its settings.
Step 8: Observe the garden and adjust
For the next several days, check the soil near the roots after a scheduled cycle and again before the next one. Look for signs of dry soil, persistently soggy soil, runoff, or water reaching areas that do not need it. Check containers separately because they can dry faster than beds.
Adjust one zone at a time. Change its duration or frequency, then observe the result before making another change. Clean clogged emitters and inspect the filter if flow weakens. Recheck the schedule after heavy rain, a heat wave, planting changes, or seasonal shifts.
Tip: A moisture check at root depth is more useful than judging only from the soil surface.
Check: The root area is moist between cycles without staying waterlogged, and each zone receives water where plants need it.
Common Mistakes to Avoid
- Putting plants with very different water needs on one schedule. — Group plants by watering needs and use separate zones or adjustable emitters where the equipment allows.
- Setting a long watering duration without checking the delivered flow. — Start with a short cycle, inspect root-zone moisture, and adjust one zone at a time.
- Leaving tubing unflushed before connecting emitters. — Flush lines as the product instructions direct so debris does not block small outlets.
- Placing a moisture sensor next to an emitter or in an unrepresentative spot. — Position it in the root zone where the soil and exposure match the plants in that zone.
Troubleshooting
Problem: One emitter or branch has little or no water.
Solution: Turn off the water, inspect the filter and tubing for debris or kinks, and clear or replace the emitter. Check that the branch connector is fully seated.
Problem: A connector leaks during the test cycle.
Solution: Turn off the water and reseat the fitting. Check that the tubing was cut cleanly and that the connector matches its diameter. Replace damaged tubing or fittings.
Problem: Plants remain dry even though the controller runs.
Solution: Check that the relevant zone is connected and open, then inspect emitter flow and soil moisture at root depth. Increase that zone’s duration or frequency gradually and check for blocked lines.
Problem: The controller does not start watering at the programmed time.
Solution: Check its clock, watering days, battery or power, rain delay, sensor reading, and valve connection. Run a manual cycle to determine whether the issue is in the schedule or water flow.
What Success Looks Like
The system runs at the programmed time, water reaches each intended plant group, and the lines remain connected without persistent leaks. Soil around the roots becomes moist after watering and does not stay saturated until the next cycle. The controller clock and zone schedule are correct, and any connected sensor reports readings and affects watering as configured.
Next Steps
Check the filter and emitters regularly, especially after dusty weather or work in the garden. Review soil moisture and controller settings when the weather changes or plants grow. Before freezing weather, follow the equipment instructions to drain or store the timer and lines. Revisit the zone map whenever you add plants, move containers, or change the garden layout.
Frequently Asked Questions
How often should an automated garden system water?
Set frequency according to plant type, soil, weather, and how quickly the root zone dries. Start with a modest schedule, then check soil moisture between cycles and adjust each zone. Follow any local watering restrictions.
Can one timer control both a vegetable bed and containers?
It can if the timer and tubing support the layout, but beds and containers often dry at different rates. Use separate zones or adjustable emitters where possible, and check container soil more often.
Do I need a soil moisture sensor?
No. A sensor can help a compatible controller skip watering when soil is moist, but you can also check soil by hand. Place a sensor where it represents the zone; a reading from one spot may not reflect the whole garden.
Why is drip irrigation not watering evenly?
Common causes include a clogged filter or emitter, a kinked line, unsuitable pressure, or too many emitters for the water supply. Inspect the line and filter, then compare flow at the start and end of each branch.
Should I leave the system running in rainy weather?
Pause watering when rain has moistened the root zone. Use a rain delay or compatible sensor if available, and check soil before restarting the schedule.