Use this guide to select, position, and operate a space heater that keeps your greenhouse within the temperature range your plants need. It is for greenhouse owners who can measure the growing space and follow appliance safety instructions, including beginners who are new to heating. Allow 2-4 hours to assess the space and set up the heater, then monitor it through at least one cold night. Heater sizing, moisture, electrical or fuel safety, and uneven temperatures are the main points to manage.

Get garden gear delivered free with Prime
- Fast, free delivery on millions of items
- Prime Video, Amazon Music and more included
- Member-only deals all year

Buyplus 1500W Greenhouse Heater with Digital Thermostat – Red
- ✔ Power: 1500 watts
- ✔ Listed coverage: Up to 215 sq ft
- ✔ Temperature range: 40°F–108°F
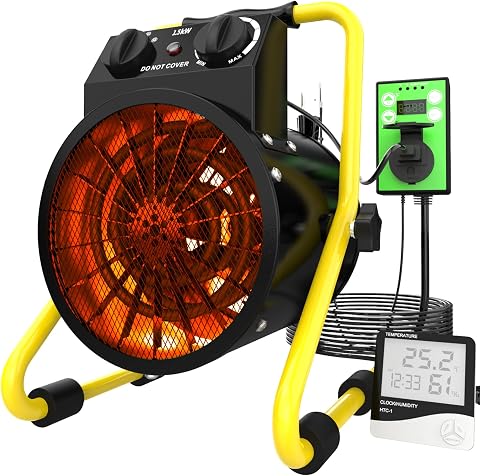
Buyplus Greenhouse Heater with Digital Thermostat, 1500W Electric Space Heater for Patio, Garage, Greenhouse (Black)
- ✔ Power: 1500 watts
- ✔ Listed coverage: Up to 215 sq ft
- ✔ Temperature range: 40°F–108°F

Greenhouse Heater with Thermostat, 1500W Outdoor Heater for Patio, Auto Temp Control & Overheat Protection, Non-Slip Cushion, Ele…
- ✔ Power: 1500 watts
- ✔ Voltage: 120 V AC
- ✔ Amperage: 13 A
Difficulty: Intermediate | Time: 2-4 hours for planning and setup, plus overnight monitoring
What You’ll Need
Tools & Materials:
- Tape measure
- Minimum/maximum thermometer or temperature logger
- Manufacturer’s heater manual
- Grounded, appropriately rated outlet and circuit for an electric heater, or approved fuel supply and ventilation for a fuel heater
- Stable, noncombustible heater base if required by the manufacturer
Knowledge:
- How to measure greenhouse length, width, and height
- The minimum temperature range for the plants being grown
- How to identify the heater’s fuel type, power rating, clearance rules, and operating limits
Check local electrical, fire, and fuel appliance requirements before setup. Greenhouses are damp, and ordinary indoor heaters or extension cords may not be rated for that environment. Follow the heater manual and use equipment rated for the location. Do not use an unvented combustion heater unless its manufacturer and local rules specifically permit that greenhouse use.
Buyplus 1500W Greenhouse Heater with Digital Thermostat – Red
This Buyplus is the strongest all-around fit in this group for growers who want a defined thermostat setup. Its waterproof probe and stated 40°F–108°F adjustment range provide more specific control information than the black Buyplus listing, which describes a digital thermostat but does not specify a probe. That distinction can matter when positioning the sensing point is part of your greenhouse routine. The unit also offers fan-only operation, an adjustable angle, and a 7.5-foot cord, giving us useful placement and circulation options without changing its basic 1500W limit.The listing states coverage up to 215 square feet, but that figure should not be read as a guarantee for every greenhouse. Drafts, glazing, insulation, and outdoor temperatures all affect the heat a space loses. Compared with the third pick, this model has two operating modes rather than three, so it lacks a separately described low-heat option. It is best for a modest space where thermostat control is the priority; growers heating a large or poorly insulated structure should consider whether one 1500W electric heater is enough. Its portability does not remove the need for a suitable outlet and careful placement.
Pros:
- Digital thermostat includes a waterproof probe and a stated 40°F–108°F range.
- Fan-only mode supports air circulation without full heating.
- Adjustable angle, handle, and 7.5-foot cord aid placement.
- Overheat protection and a self-resetting heat breaker are listed.
Cons:
- 1500W output may not meet the needs of a large or poorly insulated greenhouse.
- Requires AC power and has no listed timer or remote control.
Best for: Growers with a modest, powered greenhouse who want a digital thermostat with a specified waterproof probe and adjustable temperature range.
Not ideal for: Owners of large, drafty, or unpowered greenhouses, or anyone who wants three heat settings, scheduled operation, or remote control.
Bottom line: We rank the red Buyplus first for its specified probe and temperature range, provided your greenhouse’s heat demand fits a 1500W unit.
“We rank the red Buyplus first for its specified probe and temperature range, provided your greenhouse’s heat demand fits a 1500W unit.”
Buyplus Greenhouse Heater with Digital Thermostat, 1500W Electric Space Heater for Patio, Garage, Greenhouse (Black)
The black Buyplus is the simpler choice for someone who wants a digital thermostat and two basic operating modes without relying on the red model’s specifically described waterproof probe. It shares the other Buyplus’s 1500W output, stated coverage of up to 215 square feet, fan-only setting, and 7.5-foot cord. For buyers comparing the two, the supplied information points to closely matched core capacity; the red unit has the clearer advantage in probe details, while this listing provides dimensions of 14 by 10 by 10 inches.Its fan-only mode can help circulate air when full heat is unnecessary, but there is no listed low-heat setting like the third heater offers. The description also notes no timer or remote, which makes this less convenient for growers hoping to schedule operation without returning to the unit. We would consider it when the thermostat and basic heat-and-fan controls meet the job, and skip it if the probe specification is essential to your setup. As with its red counterpart, the stated area is not a promise of performance under every combination of cold, drafts, and greenhouse construction.
Pros:
- Digital thermostat is included for temperature control.
- Fan-only and full-heating modes support two common operating needs.
- The listing states coverage up to 215 sq ft and includes a 7.5-foot cord.
- Portable handle and non-slip base support repositioning.
Cons:
- The supplied details do not specify a waterproof probe as the red Buyplus listing does.
- No built-in timer or remote control is listed.
Best for: Growers who want a portable 1500W heater with a digital thermostat, fan-only option, and stated coverage, and do not require a specified waterproof probe.
Not ideal for: Buyers who need a low-heat mode, scheduled controls, remote operation, or more capacity for a large greenhouse.
Bottom line: We recommend the black Buyplus for straightforward thermostat-controlled heating, while the red version is the more clearly specified option for probe-based control.
“We recommend the black Buyplus for straightforward thermostat-controlled heating, while the red version is the more clearly specified option for probe-based control.”
Greenhouse Heater with Thermostat, 1500W Outdoor Heater for Patio, Auto Temp Control & Overheat Protection, Non-Slip Cushion, Ele…
This heater’s defining advantage is the choice of three operating modes: fan-only, low heat, and high heat. That extra low setting gives us a middle step the two Buyplus models do not list, which may suit growers who want to adjust output rather than move directly from circulation to full 1500W heating. The description also mentions a thermostat and an optional digital thermostat with a temperature display. Since the supplied details do not clarify whether that digital control is included or an add-on, buyers should confirm what comes in the package before relying on it.Compared with the red Buyplus, this model does not come with a clearly specified waterproof probe or stated temperature adjustment range in the provided specifications. It is therefore a stronger match for mode flexibility than for documented probe-based control. The product description claims rapid PTC heating, but its specifications identify a radiant element; we would avoid choosing it based on heating technology claims alone. The unit remains limited to 1500W and requires a 120V AC outlet. Its handle, non-slip cushion, and angle adjustment help with placement, but there is no listed remote or smartphone control.
Pros:
- Three modes include fan-only, low heat, and high heat.
- Thermostat control and a digital temperature display are described.
- Handle, non-slip cushion, and adjustable angle support portable placement.
- Overheat protection is listed.
Cons:
- The supplied specifications do not state a coverage area or thermostat temperature range.
- The digital thermostat is described as optional, so package contents need confirmation.
- Requires a standard AC outlet and has no listed remote or smartphone integration.
Best for: Growers who value a fan-only setting and separate low- and high-heat modes for a small powered greenhouse or grow tent.
Not ideal for: Buyers who need clearly specified probe-based thermostat control, a stated coverage area, remote scheduling, or heat for a large structure.
Bottom line: We favor this model when having a low-heat step matters more than the red Buyplus’s clearly specified probe and temperature range.
“We favor this model when having a low-heat step matters more than the red Buyplus’s clearly specified probe and temperature range.”
As an Amazon Associate we earn from qualifying purchases.
Before You Start
Find the coldest temperature your plants can tolerate and the lowest outdoor temperature expected during the period you need heat. A heater that merely warms the air near itself may leave plants at the far end too cold. Repair obvious drafts, close doors and vents as appropriate, and keep any required ventilation paths open. Never block a heater’s air intake or exhaust to reduce heat loss.
Keep heaters away from leaves, plastic film, irrigation lines, pots, stored fuel, and anything that can burn. Maintain the clearances listed in the manual. Do not place a heater where water can splash onto it or where runoff can reach its electrical connection.
Step-by-Step Instructions
Step 1: Measure the greenhouse
Measure the interior length and width, then estimate the average height. Record the covering material, whether the greenhouse is single or double glazed, and any large gaps or uninsulated walls. Use these details when comparing heater capacity; floor area alone does not show how quickly the greenhouse loses heat.
Tip: A tall greenhouse or a single-layer covering can lose heat faster than a compact, insulated space of the same floor area.
Check: You have written down the dimensions, covering type, and major sources of heat loss.
Step 2: Set a target temperature
Look up the minimum night temperature for the plants you are protecting. Set the target with a margin above that minimum so short cold spells or thermostat variation do not expose plants to damaging temperatures. If the greenhouse contains plants with different needs, group them by temperature range or protect the most sensitive plants separately.
Tip: Do not use a single target for mixed plantings unless all plants tolerate it.
Check: You have a specific target temperature and know which plants depend on it.
Step 3: Choose a heater and fuel type
Compare models rated for greenhouse or damp-location use, with a thermostat and safety features such as overheat protection. For electric heaters, check the wattage and the circuit’s capacity. For fuel heaters, check the required fuel, ventilation, emissions guidance, and local rules. Use the manufacturer’s sizing guidance or a greenhouse heat-loss calculation that includes covering and expected outdoor temperatures; do not select by floor area alone.
Tip: If the capacity calculation is unclear, ask a greenhouse supplier or qualified heating professional to size the unit for the coldest conditions you expect.
Check: The heater is suitable for the greenhouse environment, can meet the estimated heat demand, and has a compatible power or fuel source.
Step 4: Prepare the space and power source
Clear the location of leaves, cardboard, fabric, and other combustibles. Confirm that the floor or base is stable and that the heater can meet its required clearances. For electric models, use a properly grounded outlet on a circuit rated for the heater and greenhouse conditions. Do not daisy-chain extension cords, use a light-duty indoor cord, or overload a circuit. Have a qualified electrician check the circuit if its capacity or protection is uncertain.
Tip: Keep the plug, outlet, and controls outside areas where irrigation spray or condensation collects whenever the installation permits.
Check: The site is stable, dry enough for the equipment rating, clear around the heater, and supplied by an appropriate circuit or approved fuel connection.
Step 5: Position the heater and thermostat
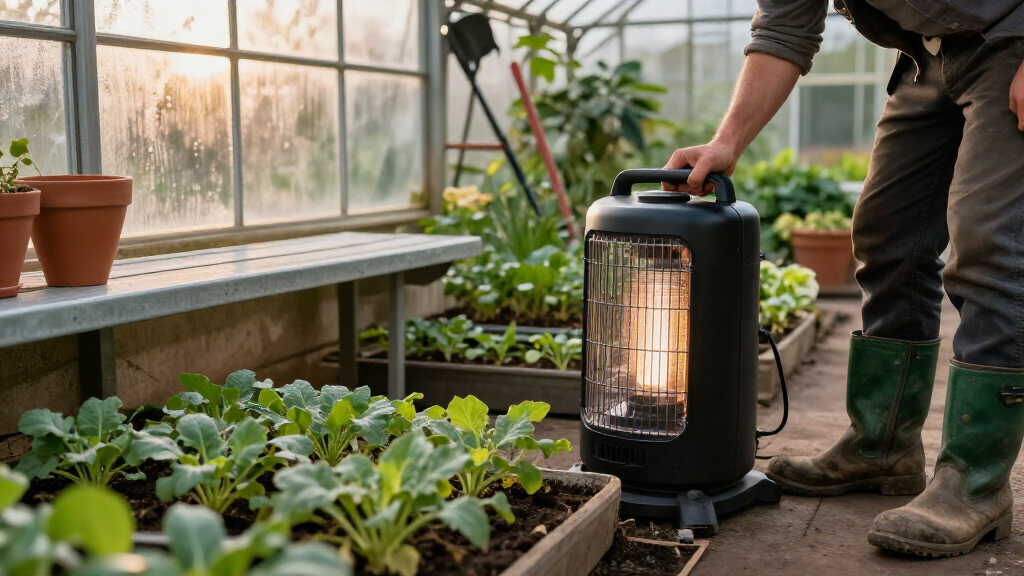
Place the heater on its specified base and aim its airflow into open space, not directly at plants, plastic, or the thermostat. Position the thermostat sensor near plant height, away from the heater’s direct heat, cold drafts, and sunlight. Leave the manufacturer’s clearance on every required side and keep the unit away from walkways where it could be bumped.
Tip: A small circulating fan can help reduce hot and cold spots, but place it so it does not obstruct the heater or blow directly onto delicate plants.
Check: The heater is stable and unobstructed, and the sensor measures the temperature where the plants are.
Step 6: Set the thermostat and safety controls
Follow the manual to set the target temperature and any fan, timer, or high-limit controls. Use the thermostat’s normal operating mode rather than bypassing its controls. For a fuel model, follow the specified lighting and shutdown procedure and keep required vents open. Install and maintain any carbon monoxide alarm required for the appliance or local rules.
Tip: Never leave a fuel heater operating in a way the manufacturer prohibits, and never disable a tip-over or overheat switch.
Check: The heater starts and stops according to its controls, with no warning lights, unusual smells, or blocked vents.
Step 7: Check temperatures through a cold period
Place a thermometer or logger at plant height near the coldest part of the greenhouse, away from direct heater airflow. Run the heater during a cold evening and overnight while checking its operation at intervals. Compare the recorded minimum with the target and inspect plants and nearby surfaces for excessive heat, drying, or condensation.
Tip: Do not assume the thermostat reading represents the whole greenhouse; check at more than one location if the space is long or divided.
Check: The coldest monitored area stays at or above the target, and plants and nearby materials show no signs of overheating.
Step 8: Adjust and maintain the setup
If the coldest area falls below target, check for drafts, sensor placement, blocked airflow, and adequate heater capacity before raising the setting. If one area is much warmer, redirect airflow or improve circulation without reducing required clearances. Clean and inspect the heater as directed by its manual, and recheck the setup after moving benches, changing the covering, or changing the plants.
Tip: Unplug electric equipment before cleaning when the manual directs it, and shut down fuel equipment using its specified procedure.
Check: Temperature readings are stable across the growing area, and the heater and connections show no damage or abnormal operation.
Common Mistakes to Avoid
- Choosing a heater based only on greenhouse floor area. — Use the manufacturer’s sizing guidance or a heat-loss estimate that accounts for height, covering, drafts, and expected outdoor lows.
- Putting the thermostat beside the heater or in a draft. — Place the sensor at plant height in a representative location away from direct heat, cold air leaks, and sunlight.
- Using an indoor heater or undersized extension cord in a damp greenhouse. — Use equipment and wiring rated for the location and the heater load; have a qualified electrician check uncertain circuits.
- Directing hot airflow at leaves or plastic. — Aim the outlet into open space, keep the specified clearances, and check nearby surfaces during the first operating period.
Troubleshooting
Problem: The greenhouse does not reach the target temperature.
Solution: Check that doors and vents are in the intended position, the heater is operating normally, and the thermostat sensor is not being warmed directly. Measure the coldest area. If the unit is correctly installed but still cannot maintain the target, reduce heat loss where appropriate or consult a supplier about capacity.
Problem: One end is warm while the other stays cold.
Solution: Check for drafts and blocked airflow, then use a suitable circulating fan or adjust heater orientation while preserving clearances. Take readings at plant height in both areas before making further changes.
Problem: The heater cycles on and off too often.
Solution: Move the thermostat sensor away from the heater’s direct airflow and obvious drafts. Check the manual for thermostat placement and minimum cycling guidance. If cycling continues, arrange a service check.
Problem: A breaker trips, a plug feels hot, or a fuel odor appears.
Solution: Turn the heater off and follow the manual’s shutdown instructions. Do not reset a repeatedly tripping breaker or continue using a hot or damaged connection. For fuel odor, leave the area, avoid flames and switches, and contact the fuel supplier or emergency service according to local guidance.
What Success Looks Like
The heater is stable, unobstructed, and connected to an appropriate power or fuel source. Its thermostat sensor measures conditions at plant height, and overnight readings from the coldest area remain within the plants’ safe temperature range. The heater cycles normally, required ventilation stays open, and there are no hot plugs, fuel odors, warning lights, scorched surfaces, or overheated plants.
Next Steps
Keep a simple record of nightly minimum temperatures and heater settings during cold weather. Inspect the heater, cord or fuel connection, sensor, and clearances regularly, following the manual’s maintenance schedule. Recheck capacity and temperature distribution when you add plants, change greenhouse coverings, or face colder weather. If the heater cannot maintain the target safely, stop using an unsuitable or damaged unit and consult a qualified heating or electrical professional.
Frequently Asked Questions
Can I use a household space heater in a greenhouse?
Only if the manufacturer rates it for the greenhouse’s damp conditions and the installation meets its clearance, power, and ventilation requirements. Many household heaters are not designed for condensation or water exposure, so check the rating and manual before use.
Where should I put the greenhouse heater?
Place it on a stable surface where its outlet can heat open space and where it meets all manual clearances. Keep it away from plants, plastic, water, walkways, and combustible materials. Position the thermostat sensor separately at plant height.
Should I leave a greenhouse heater on overnight?
Use overnight operation only if the heater is designed for continuous operation and its manual permits it. Set the thermostat, preserve required ventilation, and monitor temperatures during the first cold nights. Do not leave a heater operating unattended if its instructions prohibit that use.
Is an electric or fuel heater better?
It depends on the greenhouse, available power, heater capacity, ventilation, and local requirements. Electric models avoid combustion exhaust but need a suitable circuit and damp-location rating. Fuel models need the specified fuel handling, ventilation, and emissions precautions.
How can I tell whether the heater is large enough?
Use the manufacturer’s sizing method or a heat-loss calculation for the greenhouse dimensions, covering, drafts, and expected outdoor temperature. Confirm the result by logging temperatures in the coldest area during a suitably cold night.