
TL;DR

Get garden gear delivered free — and shop member deals
- Fast, free delivery on millions of items
- Access to Prime Big Deal Days deals on October 6–7
- Prime Video, Amazon Music and more included
Spooky garden decorations work best when you choose one clear theme, build a focal point, and use weather-ready materials with safe lighting. Combine a few classic horror motifs with natural details, keep paths clear, and add affordable DIY touches such as painted cardboard tombstones or ghostly sheets.
A single white ghost swaying above a dark garden path can feel spookier than twenty decorations crammed onto a lawn. The secret is placement, lighting, and a clear theme, not an overflowing shopping cart.
With the right plan, you can turn a porch, flower bed, or narrow side yard into a Halloween scene that feels eerie after dusk and still works for everyday life. You’ll learn how to choose a theme, make budget-friendly decorations, handle wind and rain, and keep your display safe for guests, children, and pets. Think of your garden as a tiny stage: the path is the entrance, the lighting sets the mood, and one memorable centerpiece gets the applause.
Choose one main theme, such as a graveyard or witch’s garden, and repeat a few colors or motifs.
Build one focal point and guide visitors toward it with a short, clear route.
Use outdoor-suitable materials and secure DIY decorations against rain and wind.
Keep paths visible and clear; put flickering effects away from steps and doorways.
Reuse durable props and choose lighting that fits your garden’s sunlight and power needs.
Choose one spooky theme to make your garden feel planned
Spooky garden decorations feel more convincing when you choose one main theme and repeat its colors, shapes, and story across the yard. Pick a haunted graveyard, witch’s garden, ghostly woodland, or classic monster scene, then let a few supporting details carry it through. One clear idea reads as a scene; a jumble of unrelated props can look like a storage box tipped over.
For example, a graveyard theme might pair three foam tombstones with a crooked branch, a low lantern, and a scattering of artificial leaves. A witch’s garden could use dark pots, dried stems, a broom beside the gate, and a single green light on a focal plant. These classic horror motifs work because visitors recognize them quickly, even from the sidewalk.
Seasonal details can soften the scene without making it less spooky. Add elements like pumpkins, bare branches, and a few bats to connect the display to autumn. If your garden already has shrubs or a stone path, use them as part of the set rather than hiding them; natural shapes and shadows often do more than another plastic prop.
Ask yourself: does every decoration belong to the same story? If you love both skeletons and ghosts, you can still use both—just give them a shared setting, such as a ghostly graveyard. The important aspects of a cohesive display are repetition and restraint: echo a color or motif, then leave enough dark space for the scene to breathe.
outdoor weatherproof Halloween decorations
As an affiliate, we earn on qualifying purchases.
As an affiliate, we earn on qualifying purchases.
Build a focal point that makes visitors stop and look
A strong focal point gives your spooky garden one memorable scene for visitors to notice first. Place the largest or brightest feature where people naturally look—near the gate, at the end of a path, or beside the porch—and use smaller decorations to lead their eyes toward it. This simple visual route makes even a small yard feel like an experience.
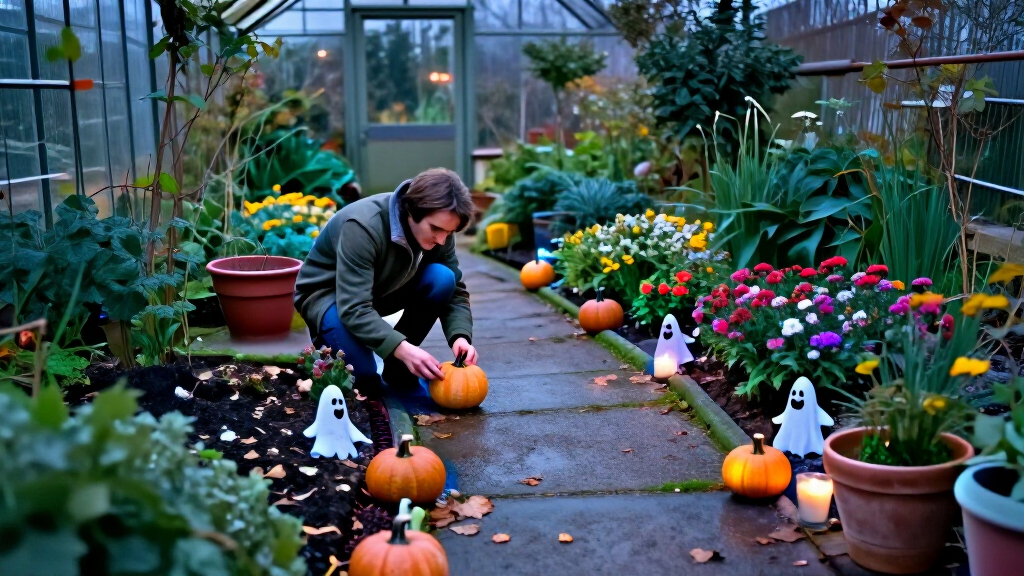
Try a short haunted pathway that ends at a skeleton seated beside a light-up gravestone. Put a small orange lantern near the start, then add a hanging ghost halfway along the path. The sequence works like a good ghost story: a hint, a pause, and then the reveal. If you have only a porch and one flower bed, cluster the scene around a single planter instead of spreading props thinly across the whole frontage.
Before you set anything down, walk the route a visitor would take. Check that steps, paving stones, and doorways stay clear, especially after dark. A dramatic shadow is fun; a hidden garden hose underfoot is not. Keep cords out of walking areas and secure lightweight decorations so a gust doesn’t send them tumbling.
If your front garden faces a busy street, keep the most detailed pieces closer to the house and use a clear silhouette near the pavement. A black cat cutout against a lit window can read better from a distance than a pile of small props. For a haunted house or graveyard look, make one scene the star and let the rest of the yard support it.
As an affiliate, we earn on qualifying purchases.
Use affordable DIY decorations that can handle outdoor weather
You can make convincing spooky garden decorations on a small budget by reusing sturdy household materials and protecting them from rain. Focus on simple shapes, outdoor-safe finishes, and decorations you can bring inside when the weather turns rough. A painted cardboard tombstone may work for a dry party night, while treated wood or plastic will last longer through a damp October.
For a quick example, cut tombstone shapes from corrugated plastic, paint them grey, and add lettering with a paint marked for outdoor use. Push them into the soil with smooth garden stakes, then add moss or fallen leaves at their bases. You can also hang a ghost made from a white sheet over a lightweight frame; tie it firmly so it won’t blow across the garden like a runaway sail.
Use this short process to plan a DIY piece:
- Choose a dry, stable base, such as a plastic panel, treated wood, or a secured frame.
- Check paint and adhesive labels for outdoor suitability and follow the manufacturer’s directions.
- Round or cover sharp edges and attach the decoration firmly.
- Test it outside before Halloween night, then bring it in or secure it during strong wind.
Natural materials add lovely texture, but fresh moss and branches can become slippery or break. Keep them away from steps and paths. If children or pets share your garden, choose non-toxic materials and store small pieces, paints, and adhesives out of reach while you work.
As an affiliate, we earn on qualifying purchases.
Choose lights that look eerie without making paths unsafe
The best spooky lighting creates shadows while leaving walking routes easy to see. Use low, indirect light around plants and props, then add a brighter, steady light at steps, gates, and uneven paving. A little glow can make a skeleton look mysterious; total darkness can make your visitor miss the step in front of it.
Solar garden lights are handy for a simple display because they avoid trailing power cords, though their brightness depends on sunlight and the model. Battery-powered LEDs offer more control over placement. For example, tuck a warm orange LED behind a pumpkin and aim a dim purple light at a bare branch; the pumpkin glows while the branch throws claw-like shadows across the fence.
Newer decorations may include motion sensors, app-controlled lighting, sound effects, or color-changing LEDs. A motion-activated skeleton can make a lively surprise near a wide lawn, but repeated shrieks beside a narrow gate may startle young children or disturb neighbors. Test sound levels and sensor range before the evening, and avoid pointing bright lights toward drivers or nearby windows.
Projection effects can create a ghostly shape on a wall or a pale misty pattern across a garage door. They work best on a reasonably plain surface; dense leaves break up the image. Whatever you choose, secure lights as directed, inspect batteries and cables, and keep electrical equipment suitable for outdoor use. Safe visibility beats a perfect scare when guests are walking through your garden.
As an affiliate, we earn on qualifying purchases.
Keep your display safe for children, pets, and trick-or-treaters
A family-friendly spooky garden can still be eerie when you remove trip hazards, sharp edges, and tempting small objects from the route. Keep paths open, anchor decorations, and put fragile or pointed props where children and pets can’t reach them. The goal is a good scare, not a real injury.
Walk through your setup at night before guests arrive. Check for hidden cords, loose stakes, low-hanging string, slippery leaves, and decorations that sway into the path. A plastic skeleton tucked beside a shrub may look harmless in daylight, but if its arm catches a child’s coat on a dark path, the surprise stops being fun. Place sound-activated props away from doorways where a startled visitor might step backward into someone else.
Read product labels and follow their age, setup, and outdoor-use directions. Keep batteries, small parts, paint, and adhesives away from children and pets. Some Halloween plants can be harmful if eaten, and artificial decorations can also pose choking or chewing risks; check the specific plant or product before placing it where a curious pet can reach it.
For a trick-or-treat route, give visitors a clear, well-lit approach to the door. Use a steady light on stairs and reserve flickering or colored effects for the edges of the scene. Accessibility matters, too: leave enough room for mobility aids and avoid loose coverings that slide underfoot. A spooky display should invite people in, not make them guess where the safe route goes.
Make your spooky garden greener and easier to pack away
You can make spooky garden decorations more sustainable by reusing materials, choosing durable pieces, and using solar or battery-powered lights where they suit your setup. A decoration that lasts for several seasons usually creates less waste than a collection of flimsy props discarded after one wet weekend. Reuse first, buy second is a practical rule for both the planet and your budget.
For instance, turn last year’s plastic planter into a witch’s cauldron with removable decoration, or reuse fallen branches as a frame for a ghostly figure. A bundle of dried stems can add a crooked, woodland texture without buying a new plastic backdrop. Store reusable props in a dry box after the season; a label on the box—“lights,” “graveyard,” or “ghosts”—makes next October’s setup much quicker.
Solar lighting can reduce the need for disposable batteries, but it may not shine brightly in a shaded garden or after several cloudy days. If reliable illumination matters on a path, choose a suitable low-voltage outdoor light and follow its instructions rather than relying on a weak solar glow. Durability and fit matter more than a green label alone: a well-made decoration used for years is often a better choice than a supposedly eco-friendly item that breaks immediately.
Retailers also sell themed bundles that help you create a coordinated scene, but you don’t need a full kit. Pick only the pieces that suit your space, then fill gaps with items you already own. The best seasonal setup is one you can repair, reuse, and store without turning your shed into a graveyard of broken inflatables.
Frequently Asked Questions
What are the safest spooky garden decorations for children?
Choose decorations with rounded edges, stable bases, and no small detachable parts within reach. Keep paths clear and lit, secure hanging props, and follow the age and outdoor-use directions on product labels. Check nearby plants for pet and child safety, too.
How can I create a spooky garden on a budget?
Start with a theme and use items you already own, such as planters, branches, old sheets, or reusable lights. Make one focal scene rather than buying many small decorations; a few well-placed pieces often look more convincing than a crowded display.
How do I make DIY decorations weather-resistant?
Choose materials made for outdoor use, check paint and adhesive labels, and secure decorations against wind. Test your setup before the event, and bring fragile pieces indoors during heavy rain or strong gusts.
What lighting works best for a spooky garden?
Use dim, indirect colored lights to highlight props, but add steady light to steps and walking routes. Solar lights avoid cords but depend on sunlight, while battery LEDs offer flexible placement. Keep lights and cables suitable for outdoor use.
When should I start decorating for Halloween?
Start planning early enough to test your lights and check how decorations handle local weather, then put up the display when you’re ready to maintain it. If you use natural branches or dried plants, wait until closer to Halloween so they stay tidy and fresh-looking.
Conclusion
Remember this: one clear scene, carefully placed, beats a crowded lawn. Choose a theme, light a safe route, and give visitors one striking detail to remember—perhaps a ghost drifting above a pumpkin-lit path.
Before Halloween night, take one final walk through your garden after dark. If the scene looks eerie and every step still feels sure beneath your feet, you’ve got the balance right.
Fall Picks
fall essentials
As an affiliate, we earn on qualifying purchases.